Whiteboards
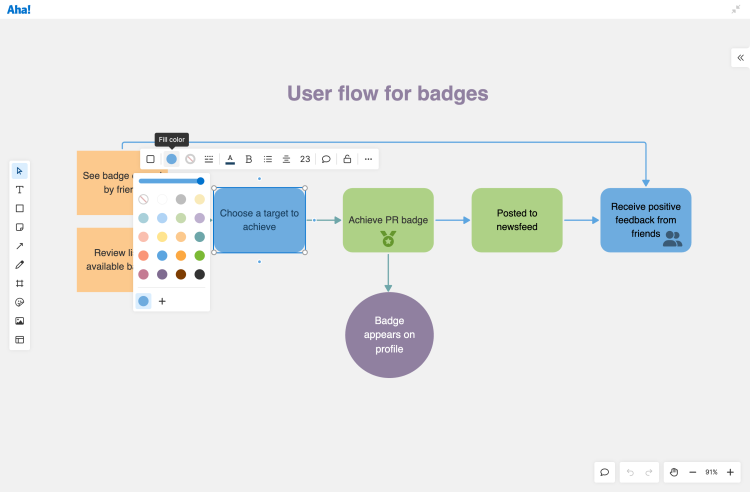
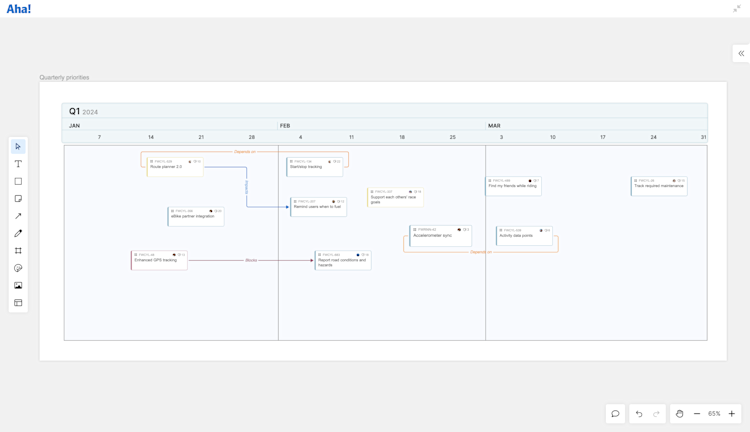
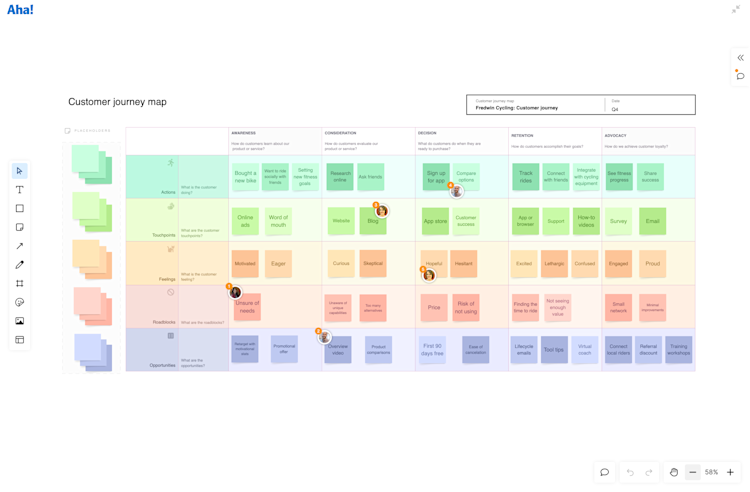
Whiteboards are a critical tool for each stage of the product development lifecycle. They help you build out and refine concepts in a visual form ā an important first step in building lovable products. Create beautiful diagrams, journey maps and user flows, and collaborate with your team to develop and visualize new concepts. And when the time is right, convert whiteboard elements into actionable items on your product roadmap.
Click the following links to skip ahead:
Add a whiteboard
There are three different ways to create a blank whiteboard.
Add a personal whiteboard to your My work page the same way you would add a personal note.
Add a new whiteboard to your team or workspace notes. Keep whiteboards neatly organized in your nested notes hierarchy and add as many new whiteboards as you choose.
Map out a user flow for a new feature or illustrate phases of a new initiative with a flowchart by embedding a whiteboard in a note or in the description field of most Aha! records ā like initiatives, features, and requirements ā so you can add visual context to the work your team is doing.
You cannot yet add a whiteboard to the description of an idea.
Create a new whiteboard
From your workspace/team or personal Notes, click + Create and select Whiteboard. Your new untitled whiteboard will open automatically. Update the name by editing its Title. The whiteboard will appear in your document hierarchy below the note you currently have selected. You can drag and drop it to change its location.
Create a copy of a whiteboard whiteboard
To create a copy of a whiteboard, right click the whiteboard from the List view and select Copy whiteboard. A copy of the whiteboard will open and will appear in the List view below the the original whiteboard document.
Embed a whiteboard in an Aha! record
Add a whiteboard to an existing note or other Aha! record from the text editor. While editing a note or record, click the + dropdown and select Whiteboard. The new whiteboard will appear one space below your cursor. Click inside the whiteboard or click the arrow icon in its top-right corner to expand the whiteboard window. Click the X in the top-right corner to close it and return to the note.
Navigate your whiteboard
The Aha! whiteboard provides infinite space to ideate, sketch, and diagram. As you add objects, your whiteboard will expand to provide even more space for you to use. You can navigate around your whiteboard and between any frames you add by using the navigation toolbar in the bottom-right corner.
Scroll around your whiteboard by selecting the Pan button or hit the Space bar.
Adjust the Zoom level with the plus and minus buttons or by pressing Ctrl and scrolling.
Navigate to a specific frame on your whiteboard by clicking the Zoom % and select a frame from the list in your frame navigation.
Scroll through frames quickly by using the Next frame and Previous frame options or by using the Space bar.
Add media
You can add media to your whiteboard to convey complex concepts, demonstrate workflows, and showcase user experiences. Support engagement and collaboration on your whiteboard by adding images, gifs, and videos.
Click the image icon on your whiteboard's toolbar. Then select the media file you would like to add.
Supported files include .mp4, .gif, .png, and .jpg. Files should be smaller than 300MB.
Add and edit images
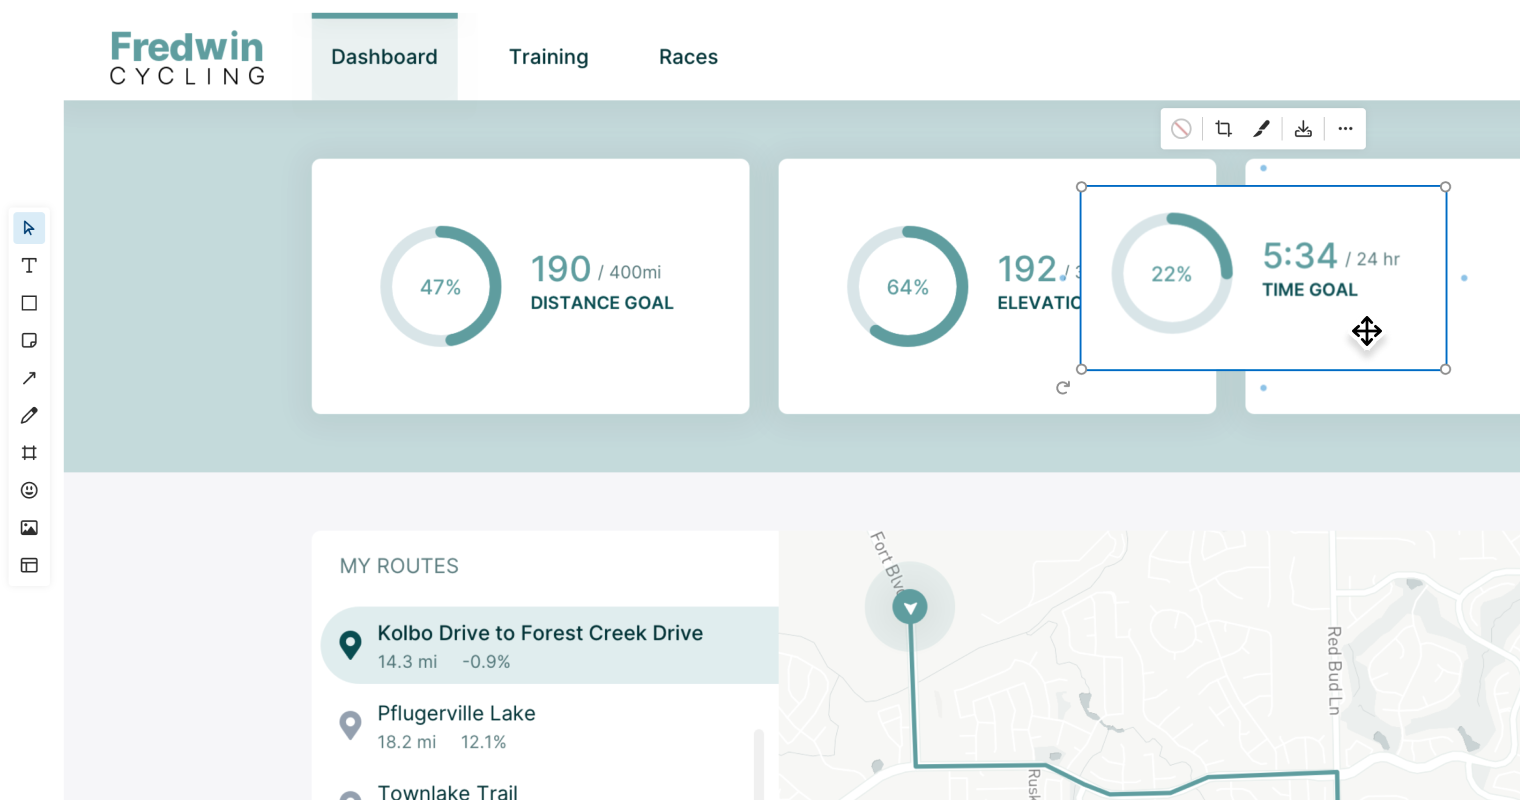
Insert images to add context to whiteboard content or create quick, easy mockups.
Upload an image using the Image tool on your whiteboard's toolbar, drag and drop an image file onto your whiteboard, or use copy and paste to insert an image on your whiteboard. From there, you can edit it using the image's toolbar.
Supported file types include .png and .jpg.
Icon | Name | Function |
Opacity | ||
Crop | ||
Clip | ||
Export | ||
Lock | ||
More options |
|
Edit opacity and overlay
You can edit any image's opacity and add a color overlay from an image's toolbar. Select your image, then select the Opacity icon from the toolbar. Select a standard color or click + to select a custom color (you can enter a hex code for a brand color here), or reset the overlay to transparent. Use the slider to edit the image's opacity.
At full opacity (with the slider all the way to the right), the color overlay will not be visible. As you move the slider to the left to reduce opacity, you will see the color overlay become more vibrant as the image's opacity decreases.
Crop images
Improve the visual quality of an image you have added to your whiteboard by cropping your image. To crop an image, click the image and select the Crop tool for the image's toolbar. Then slide the handles on the border of your image to your desired dimensions. Deselect the Crop tool or hit Return on your keyboard when you are finished to accept your cropped image.
Clip images
The clip tool is ideal for quickly illustrating a UI change or experimenting with new layouts. Use the clip tool to cut out part of an image, click and drag to move it. When you clip part of an image, the background will "self-heal" and automatically match the surrounding area. This enables you to make changes to images without needing to use another design tool.

To use the clip tool:
Add an image to your whiteboard.
Select the clip tool from the image toolbar.
Draw a rectangle around the area you want to clip.
Drag the clipped area wherever you want to place it or use the Delete key to remove it.
After you have clipped part of an image, it becomes its own object ā you can resize it, group it with other objects, copy and paste it, or move it independently around your whiteboard.
Export an image
Save any image added to a whiteboard for later use. You can export any image added to whiteboards that you have permission to edit. Click an image and select the Export icon on the image's toolbar to export the image to your computer as a .png file.
Use whiteboard templates
Your Aha! subscription includes a library of expert document templates with a range of product uses. These purpose-built templates were designed to support every step of the product development lifecycle. Add as many templates to a whiteboard as you want and organize them with frames to keep your whiteboard neat and easy to navigate.
Add a template to your whiteboard
You can access the template library when you add a new document to your workspace's Notebook page or when you add a personal document to your My work page. Click Add to add a document, then select Use a template to open the template library.
If you want to add a template to a whiteboard you are already editing, select the Template icon on your toolbar. From here, you can use the search bar at the top to find a specific template or select a template category on the left. Click a template to see its description. Click Use template to add the template to your whiteboard.
Create a new whiteboard template
The perfect whiteboard helps your team uncover insights and plan for the future ā and it looks beautiful, too. You can turn any whiteboard into a template that your team can access from the template library.
Users with owner permissions can create document templates.
To create a new whiteboard template, navigate to Settings āļø Workspace Document templates. Then click Add document template and select Whiteboard.
To create a template from a whiteboard you are currently editing, select the More options menu in the upper right corner of the whiteboard and select Save as template. Then enter a name for the template and click Create template.
You can only create templates from workspace documents.
Once saved, you will find your new whiteboard in the Custom section of the Aha! template library.
Organize your whiteboard
Use frames
You can keep your whiteboard tidy by adding frames. Use frames to organize your diagrams, templates, and other objects. Add frames and build diagrams within them or draw a frame around an area to group items together.
From your toolbar, select the frame icon and draw your frame. Then rename your frame by editing its Title field. The label you enter here will be used for the frame navigation in the lower right corner of your whiteboard.
Your frame will be named by default as "Frame" plus a number, with the first frame being "Frame 1" and so on. Frames will appear in your navigation in the order that they were added to your whiteboard.
Share a whiteboard
Invite new collaborators to your whiteboard with a shareable link. Anyone in your account can share a personal whiteboard that they have created. Owners or contributors can also share workspace or team whiteboards ā but viewers and reviewers for a workspace or team cannot share workspace or team documents.
To share a whiteboard:
Open your whiteboard and click the Share button in the upper right corner.
Click Get shareable link.
Select whether anyone with the link can View only or Edit the whiteboard.
Click Copy link.
Share the link with anyone.
You can disable the link whenever you choose. If you disable the link, anyone who has the link but has not yet accepted access to the whiteboard will not be able to access it.
If the person you want to collaborate with is not a user in your Aha! account, they can still collaborate on your whiteboard:
If the collaborator does not have an Aha! account or trial in progress, they will be prompted to create a free guest account. After they do, they will be able to access the document you shared with them.
If the collaborator accesses your shared document while they are in a trial period and then their trial expires, they will not lose access ā their trial account will become a free guest account so they can continue to access and collaborate on shared documents.
Viewing and editing permissions
After you have generated a shareable link, you can configure viewing and editing permission for any individual whiteboard. Navigate to Share People who have access. You will see two different permission sections:
Guest access: Anyone who has accessed your whiteboard from a guest or trial account will be listed here. Click anyone's initials to change their permission to Edit or View only. Hover over a guest's initials and click the trash icon to revoke their access.
Reviewer access: The default reviewer permissions for your documents will be inherited from your workspace or team settings, but you can change them on a per-document basis. Select View or Edit to update all reviewer's permissions for your whiteboard.
If a reviewer has permission to view, but not edit a document, they can click Request edit access to send an email to the workspace or team owner. The workspace or team owner can then choose to update the edit permissions for all reviewers.
Accept a whiteboard
Your colleague will provide you with a link when they want to share a whiteboard with you. Click the link to open the invitation to view the document. You can then select an option to View the document or Ignore the document.

You will be prompted to log in or sign up if you choose to View the document.
If you do not have an Aha! account, you can create a free guest account to view the document.
If you do have an Aha! account, log in to the view the whiteboard. After you have accessed it, the whiteboard will appear in the Shared with me section of your My work page. If it is located in a workspace or team that you have access to in your account, it will open within that workspace or team.
To see who has access to a shared document and will potentially see any edits you make, click the Shared icon at the top of the document next to its title.
Configure sharing settings
Account administrators can navigate to Settings Account Security and single sign-on and uncheck the box next to Enable document sharing at any time to turn off link sharing for documents. Doing so will turn off all link sharing in the account for notes and whiteboards. Any links that were generated prior to disabling this setting will stop working, and both personal and workspace or team notes and whiteboards will no longer be shareable with users outside of your Aha! account.
When document sharing is enabled, anyone in your Aha! account can share a personal whiteboard that they have created. Owners and Contributors can share workspace or team whiteboards. Viewers and Reviewers cannot share whiteboards located in a workspace or team.
Collaborate with your team
Whiteboards are built for collaboration. Your team can navigate, edit, and add new details to your whiteboard at the same time. This makes your whiteboard a great place to gather remotely for collaboration sessions. Use one of our prebuilt templates for a team meeting or brainstorming session. Vote on your next move as a team using the stamp emoji. Build out concepts visually together in real-time on collaborative flowcharts and diagrams.
When multiple users are editing a whiteboard simultaneously, you will see an avatar for each user as they navigate the whiteboard.
Users with owner or contributor permissions can edit and add comments to whiteboards. Reviewers and viewers cannot edit or add comments by default. If you give a reviewer edit access to your whiteboard, they will be able to edit and respond to existing comments.
Add comments
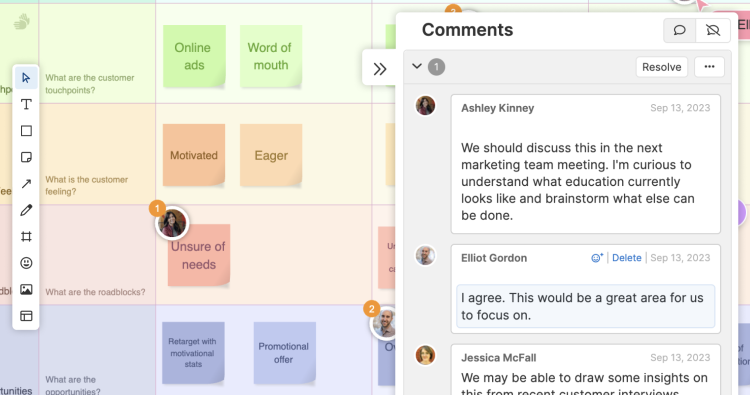
Adding comments to your whiteboard can provide an avenue for team members and stakeholders to share their thoughts, provide feedback, and engage in thoughtful discussions ā strengthening asynchronous collaboration. Add comments to individual objects to add feedback about something specific, or add comments to a general area of a whiteboard to weigh in on broader themes.
Add a comment to your whiteboard
Select the Comment icon at the bottom of your screen and click anywhere on your whiteboard to start a conversation. This will add a numbered orange dot, plus the comment author's avatar or initials to the location of your comment. Type your first comment to start a conversation and click Save comment. You can also add a comment to a specific object on your whiteboard by selecting the object and clicking the Comment icon in its toolbar.

Comments will appear in numbered order in the right sidebar of your whiteboard. You can turn a comment into a threaded conversation by replying to it.
When your conversation has been addressed or sufficiently discussed, click the Resolve button located on the header of the conversation. When a comment is resolved, the color of the numbered dot will change from orange to green.
View comments
Users accessing your whiteboard from guest accounts will not see or be able to add comments to your whiteboard.
Anyone with access to your whiteboard can view the comments that users have added to it. Comments will appear in a sidebar on the right of your screen. It will be collapsed by default ā but you can click the << icon to open it. If there are unresolved comments on your whiteboard, a Comment icon with an orange dot will show here as well. All unresolved comments will appear in the sidebar. Check the box next to Show resolved in your Comments side panel to show all resolved comments.
Click a comment in the Comments sidebar to navigate to the area of it the whiteboard it is added to. Likewise, click an orange numbered dot on your whiteboard to navigate to its corresponding comment in the Comments sidebar.
More options
Comments are a great way to start a conversation ā and sometimes they are worth sharing individually. The More options menu on each comment enables you to do a few useful actions:
Cut objects cuts the comment so it can be repasted elsewhere on your whiteboard.
Paste objects pastes a comment you have previously cut from another area of your whiteboard.
Copy link to object copies a directly link to your comment that you can share with someone. When they click it, it will direct them to the area of the whiteboard that where the comment is added.
Group objects groups comments when you have multiple comments selected.
Ungroup objects ungroups comments that have been previously grouped.
Lock will lock a comment to your whiteboard or an object so it cannot be moved.
Delete will remove a comment completely.
Export a whiteboard as an image
You can export any whiteboard you have access to as an image for use in email, Slack, or other tools. Right click into an empty area of your whiteboard and select Export to SVG or Export to PNG to download a whiteboard as an image.
Convert a whiteboard object to an Aha! record
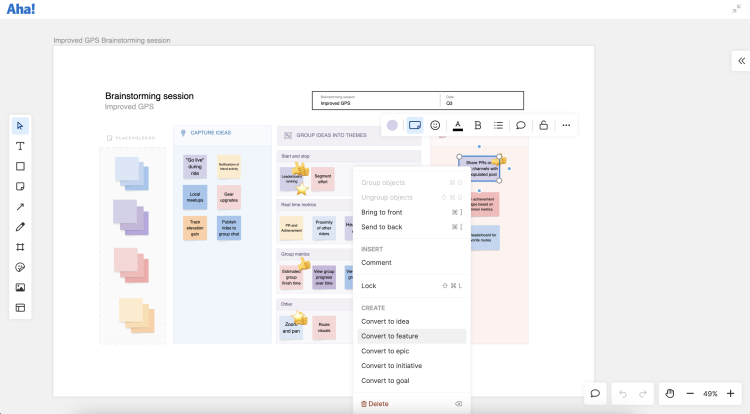
Creative tools like whiteboards are great for sparking inspiration. In fact, that is how many product teams use them. The next brilliant idea may stem from a collaborative session, a weekly team meeting, or a personal whiteboard. Put that idea into action by promoting items on your whiteboard to work on your product roadmap immediately ā then go back later and add in important details.
On your whiteboard, an object that has been converted to a record will display a link icon in its lower left corner. Clicking the link will open the record's drawer view, where you can edit and update the record's details.
Convert to ideas
Available for: Aha! Roadmaps ā Aha! Ideas ā
Use the More options button or right-click on a shape, sticky note, or text box and select Convert to idea.
Select the Workspace where you want your idea to be added. You can select any workspace or workspace line that you have access to.
Edit the idea's Name.
Click Create idea.
You will find your newly created idea record in the New ideas section of your ideas overview page. You will find a link to the whiteboard where the idea originated in its Related tab.
Convert to features
Available for: Aha! Roadmaps ā Aha! Develop ā
Use the More options button or right-click on a shape, sticky note, or text box and select Convert to feature.
Select a Release. You can select any release in any workspace or workspace line that you have access to.
Edit the feature's Name.
Click Create feature.
You will find your newly created feature record in release and workspace you selected. You will find a link to the whiteboard where the feature originated in its Related tab.
Convert to epics
Available for: Aha! Roadmaps ā Aha! Develop ā
Use the More options button or right-click on a shape, sticky note, or text box and select Convert to epic.
Select a Release. You can select any release in any workspace or workspace line that you have access to.
Edit the epic's Name.
Click Create epic.
You will find your newly created epic in the release and workspace you selected. You will find a link to the whiteboard where the epic originated in its Related tab.
Convert to initiatives
Available for: Aha! Roadmaps ā
Use the More options button or right-click on a shape, sticky note, or text box and select Convert to initiative.
Select the Workspace where you want your initiative to be added. You can select any workspace or workspace line that you have access to.
Edit the initiative's Name.
Click Create initiative.
You will find your newly created initiative in the workspace you selected. You will find a link to the whiteboard where the initiative originated in its Related tab.
Convert to goals
Available for: Aha! Roadmaps ā
Use the More options button or right-click on a shape, sticky note, or text box and select Convert to goals.
Select the Workspace where you want your initiative to be added. You can select any workspace or workspace line that you have access to.
Edit the initiative's Name.
Click Create goal.
You will find your newly created goal in the workspace you selected. You will find a link to the whiteboard where the goal originated in its Related tab.