Add and edit whiteboard content
A blank canvas offers endless possibilities. Add content to your whiteboard for any purpose — build diagrams and illustrate processes, show relationships, visualize early-stage plans, and more. Use your whiteboard's toolbar to add shapes, lines, sticky notes, media, and more.
Click any of the following links to skip ahead:
Add content
Select any of the icons on the whiteboard's toolbar and click your whiteboard to add content. You can add shapes, sticky notes, connectors, frames, media, or templates directly from your toolbar. Learn more about the different types of content you can add to your whiteboard below.
Text
After selecting the text icon from your toolbar, click your whiteboard to create a text box. Use the corners to resize it. The text box's toolbar includes various formatting options:
Color
Bold, italic, underline, strikethrough, or code snippet
Bulleted or numbered list
Left, center, or right alignment
Shapes
Your whiteboard includes a wide variety of shapes, which are the most common whiteboard object used in diagrams. Once you add a shape, you can easily add another one joined by a connector by clicking one of the small blue dots that appear outside its border. Add a shape by clicking the Shape icon on your toolbar and choose a shape. Then click and drag it to your desired dimensions.
Resize a shape by selecting and dragging its corners.
Rotate a shape by selecting the rotation icon and dragging it to your desired angle.
Format a shape using the customization options above it — you can edit the fill color and opacity or the line weight, color, and style
Add text to an object by double-clicking the object, then begin typing. Align text you have added to an object by selecting the object and clicking the Align button.
Add a comment with the comment icon on the shape's toolbar.
Advanced shapes
There are a range of advanced shapes included at the bottom of your shapes menu. Advanced shapes are great for organizing information (such as in tables) or building out early-stage roadmaps. Check out our article on advanced shapes to learn more.
Sticky notes
Sticky notes are a versatile whiteboard element. You can use stickies just like you can other whiteboard shapes, but they are intended for capturing text. That is why they are so useful for collaborative sessions. Use them to jot down your thoughts and ideas, and color code them to organize information.
If you need extra space to share your thoughts on a sticky note, you can change it to a rectangle from its toolbar. Quickly add another sticky note of the same color or shape by hovering over one of the blue dots along the border and clicking the Plus sign.
Show note author
When you have a whiteboard full of sticky notes during a team session, see who contributed them — click your whiteboard's More options menu and select Show note author. Each sticky note's author will appear beneath it. Repeat the action to remove sticky note authors.
Emoji reactions
Emojis are a simple but powerful way to convey one's feelings — and a great way to gauge sentiment. Users can add an emoji reaction to any sticky note you add to your whiteboard. This inspires further engagement as other whiteboard users add their own reactions. You will see the count of how many selected each emoji reaction to understand the overall sentiment surrounding a sticky note's content.
To add an emoji reaction, click a sticky note and select the Emoji icon from its toolbar. Then select the emoji you want to add. Click an emoji already added to a sticky to increase its count. Click an emoji you have already added to remove it.
You can hover over an emoji to see which whiteboard user(s) added it. Emojis will appear on your whiteboard in the order that they are added, left to right in rows. The first three rows of emojis will display on a sticky note.
Lines, arrows, and connectors
A connector can be an arrow or a line. Connectors can be used to join objects together or on their own as simple arrows and lines.
Add a connector by selecting the connector icon on your toolbar, then click and drag it to your desired length. You can also add a connector directly from a shape by clicking one of the connection points along an object's border.
Double-click the shape icon on your toolbar and then click a connection point on an existing shape to add both a connector arrow and additional shape with one click.
Resize a connector by selecting and dragging its endpoints.
Manipulate a connector's angles or curves by clicking and dragging the midpoints on the connector.
Connect shapes by selecting the endpoint of a connector and dragging and dropping it to a connection point on an object's border.
Pencil
Draw on your whiteboard with the pencil tool. After selecting the pencil tool from your whiteboard toolbar, you can choose to continue with the pencil or select the highlighter for a thicker line.
Frames
Frames are perfect for organizing content. Select the Frame option from your toolbar and draw it to your desired size. Add frames and build diagrams within them or a draw a frame around a template or other content you have already added to your whiteboard.
Media
Add media to your whiteboard to bring additional context to your whiteboard content. Check out our article on adding media to whiteboards to learn more about what you can do.
Template
The Aha! template library provides you with 100+ document templates that you can use at every stage in the product development lifecycle, many of which are whiteboard templates. Use the template icon to open the template library and select a template to add to your whiteboard.
Check out our article on the template library to learn more.
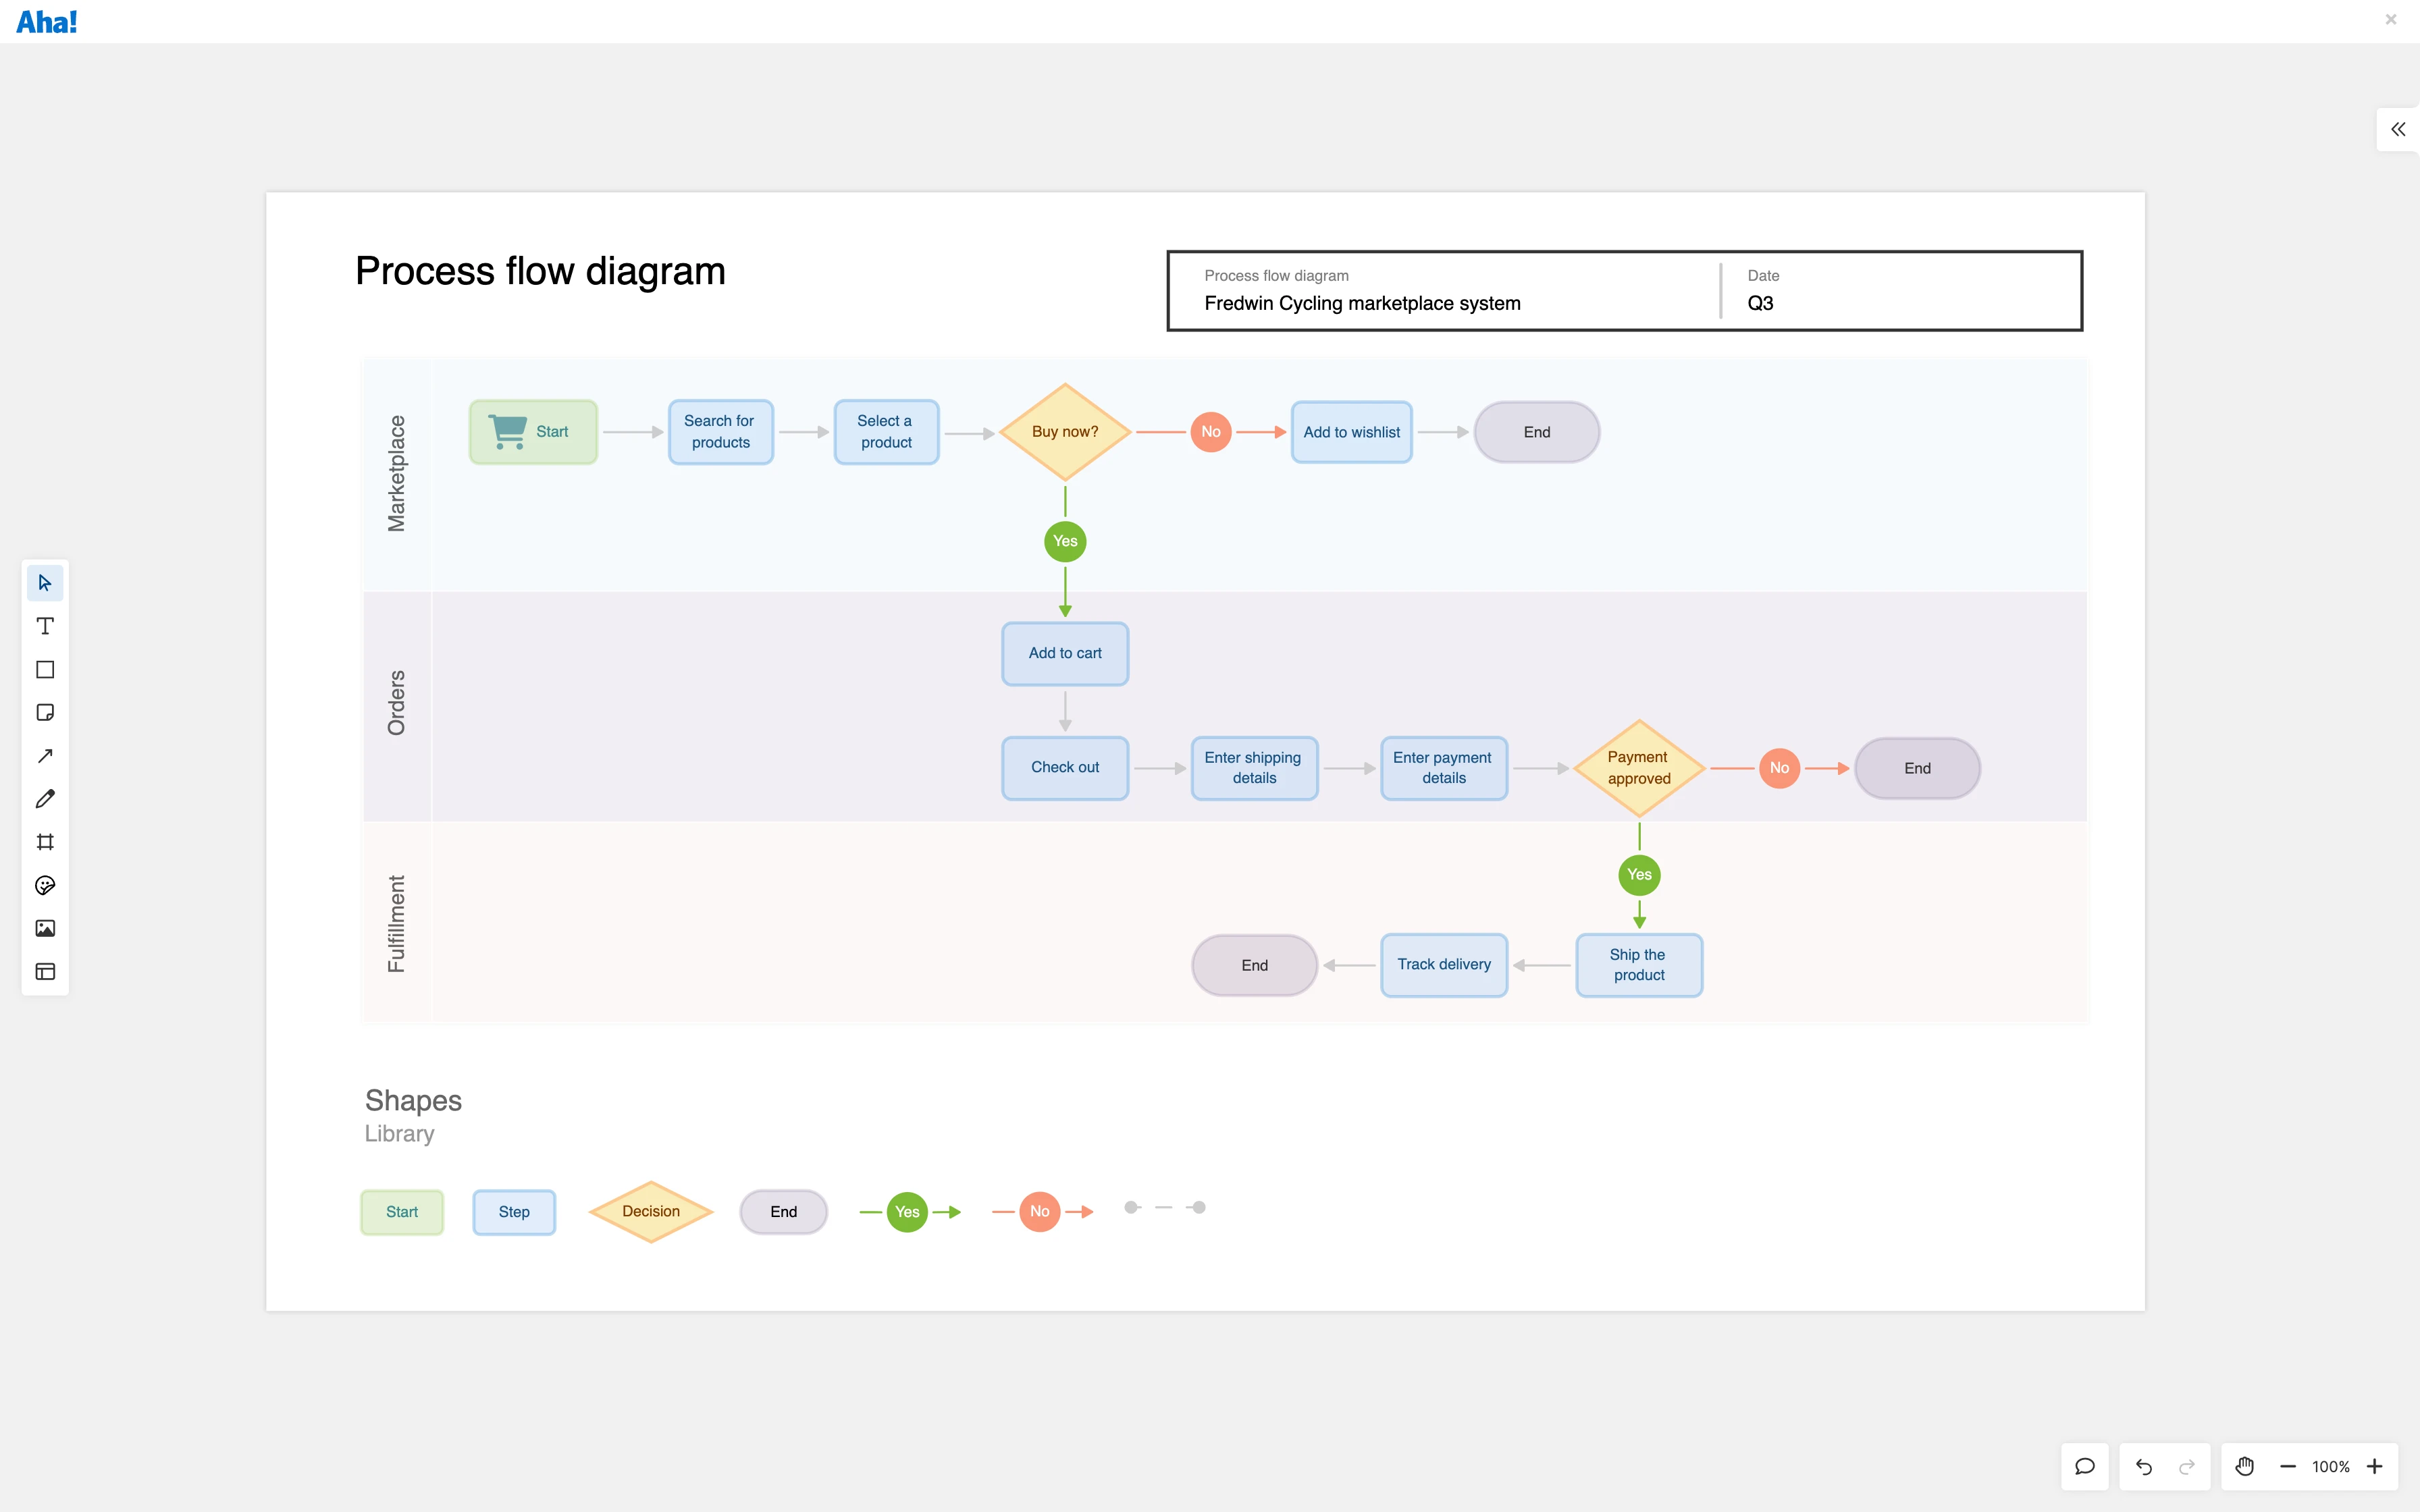
Create diagrams
Diagrams, flowcharts, decision trees. All are great visual aids to illustrate sequences, processes, structures, and hierarchies. Your Aha! whiteboard tools empower you to build attractive diagrams that are both customizable and easy to construct.
Most of the object types you can add to your whiteboard have various connection points around their borders that enable you to neatly add connectors. Although you can join almost any whiteboard objects together with connectors, shapes are the most commonly used objects in diagrams and flowcharts.
To build a diagram, start by adding objects to your whiteboard. Then join them together using connectors and arrows to show relationships, map processes and user journeys, diagram an organizational structure, or illustrate sequences.
Edit content
Click any object that has been added to your whiteboard to edit it. All objects have a toolbar that appears above it when clicked. The options that appear in the toolbar depends on the object you are editing, but most objects have border and fill options that you can use to customize an objects appearance.
Copy/paste style
After you have formatted an object, you may want the other objects on your whiteboard to have the same style. You can copy an object's style and apply it to other objects in a few clicks so you do not have to format them individually. Right-click an object and click Copy style. Then Shift+click to select the objects you want to have the same style, right-click, and select Paste style.
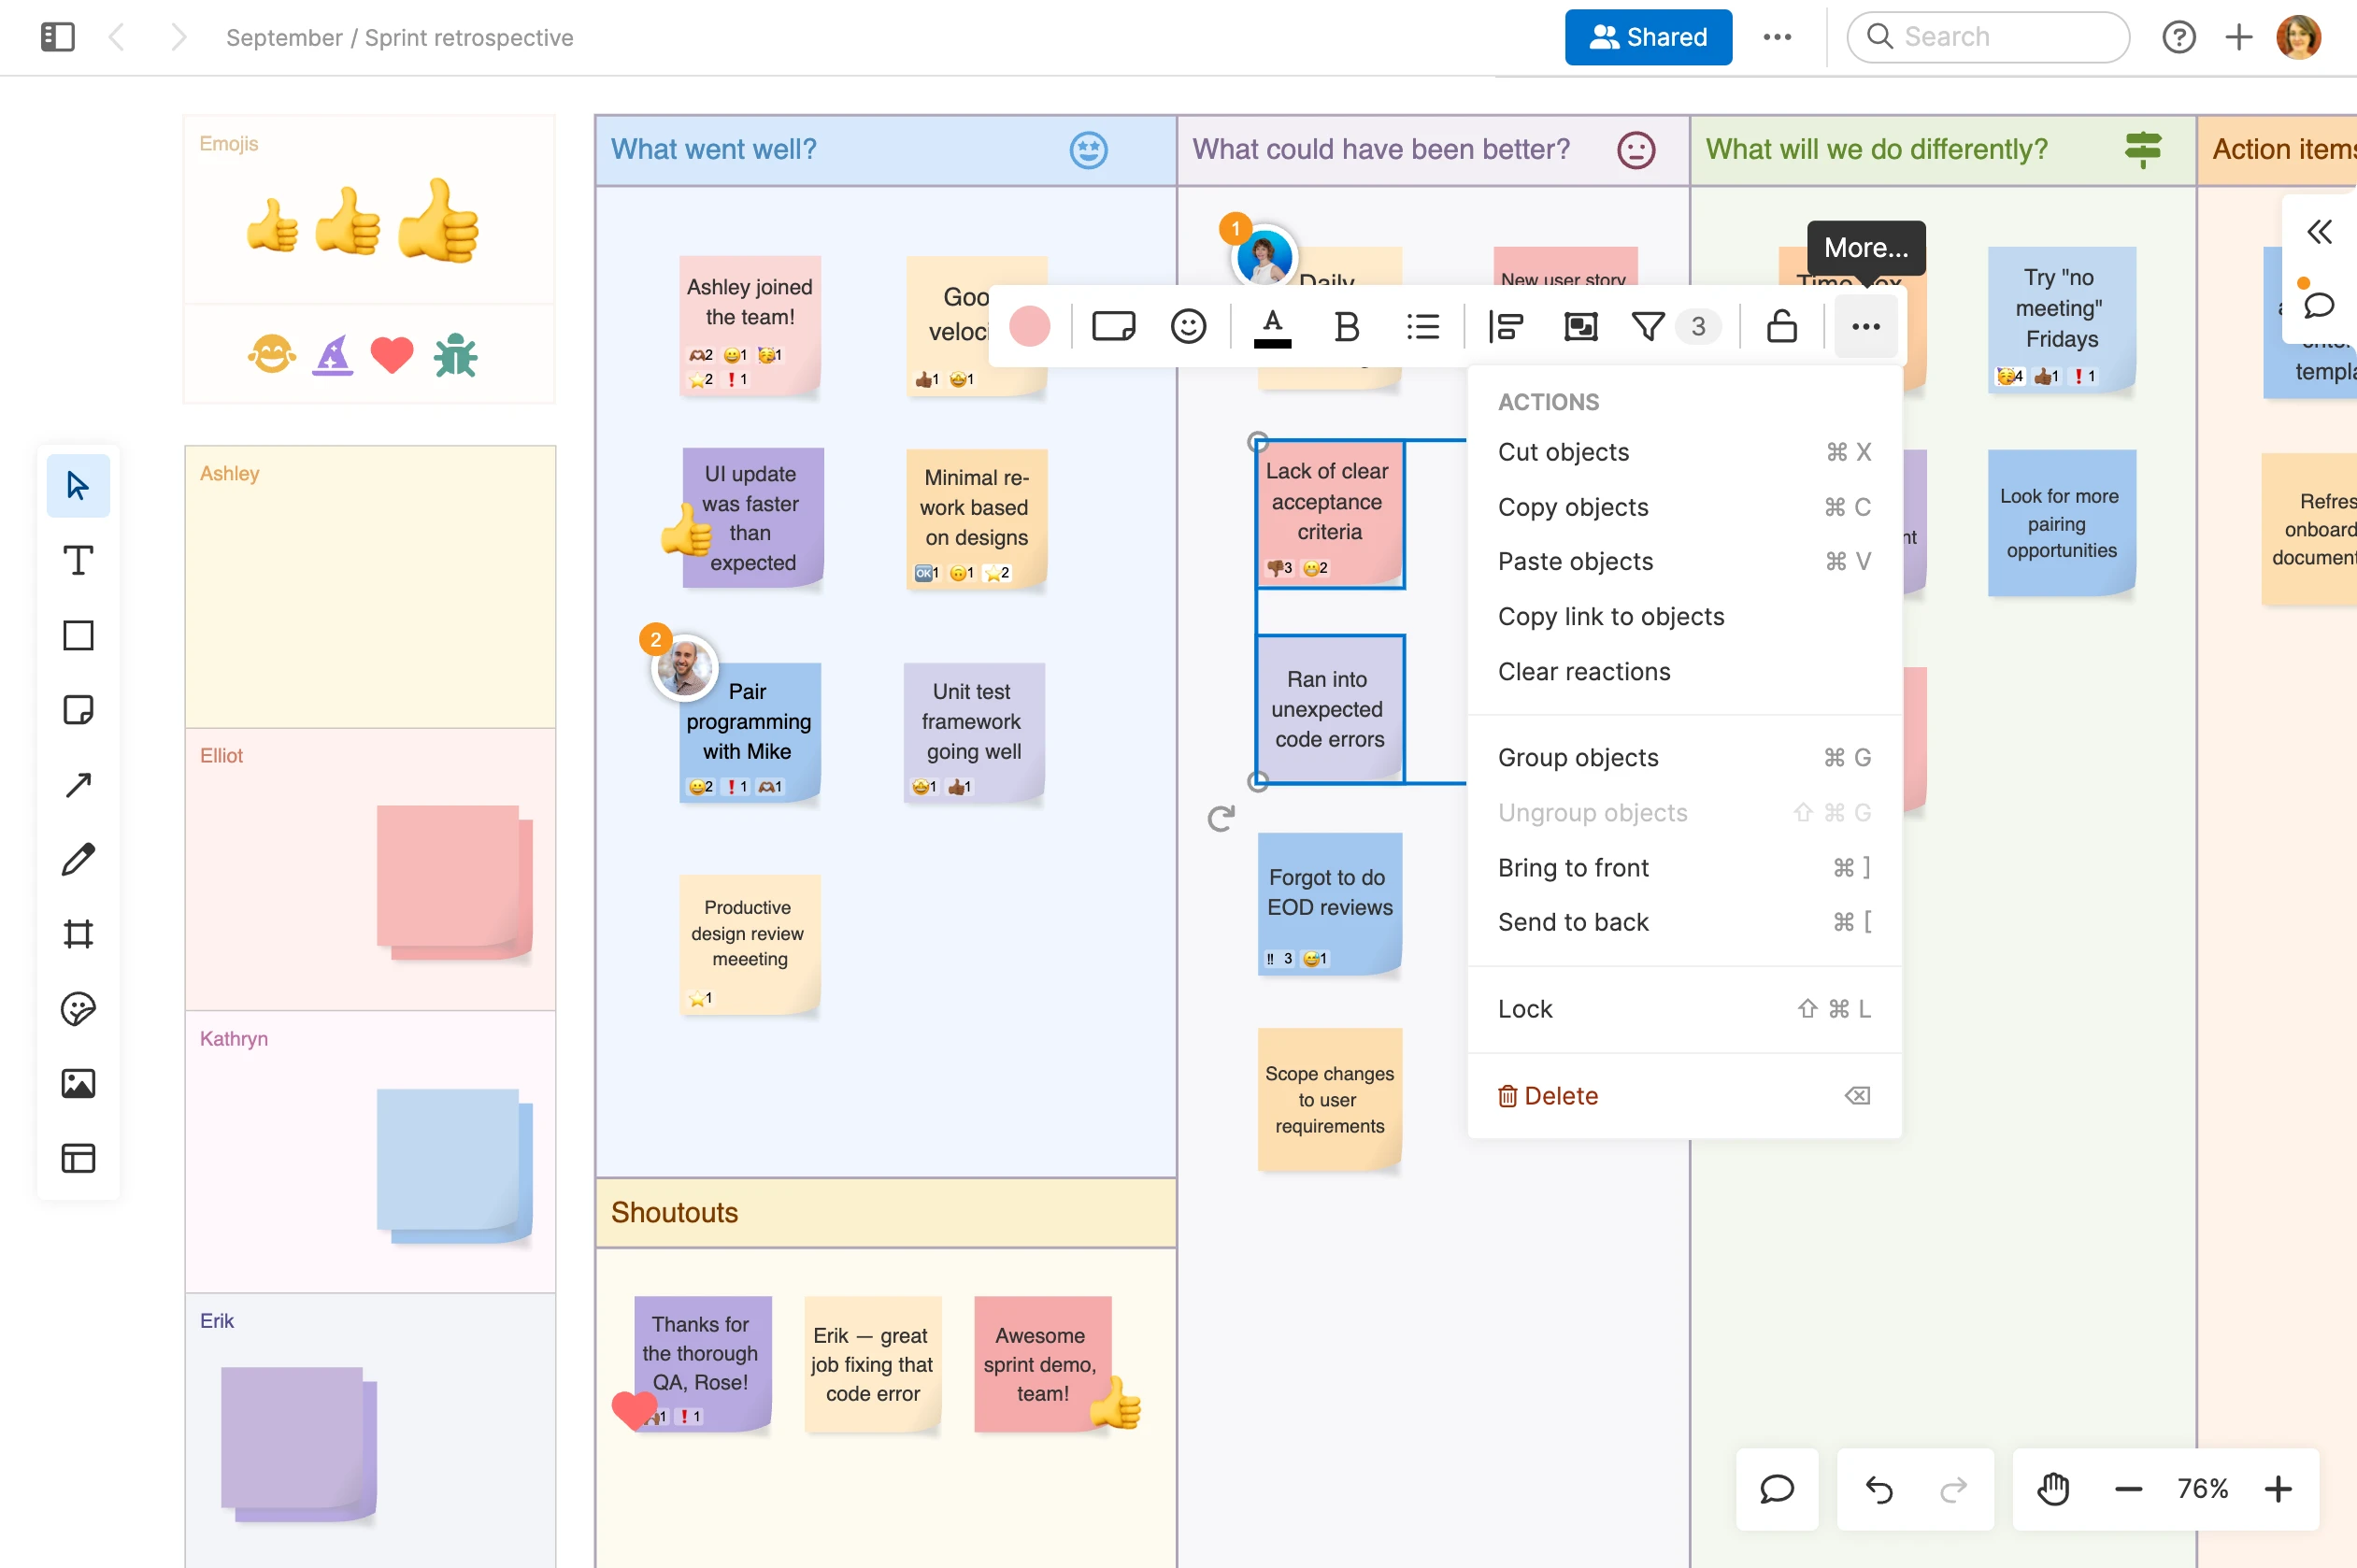
Bulk edit
Change the style or color of multiple objects at once — edit them in bulk. Bulk editing whiteboard objects saves you a lot of time when you are applying design elements to your whiteboard.
Hold down your Shift key and click all the objects you want to edit together. The bulk editing toolbar will open automatically so you can complete your edits.
The options that appear in the bulk editing toolbar depend on the objects that you have selected. Only options that all selected objects have in common will be available. For example, if all of the objects you have selected are sticky notes, then the wide sticky note option will appear — but if you have selected a circle shape and a sticky note, that option will not appear because one of your selected items is not a sticky note.
After building a diagram on your whiteboard, keep it safe from accidental edits — select the entire diagram to edit all of the object and select the Lock icon to lock the entire diagram to your whiteboard.
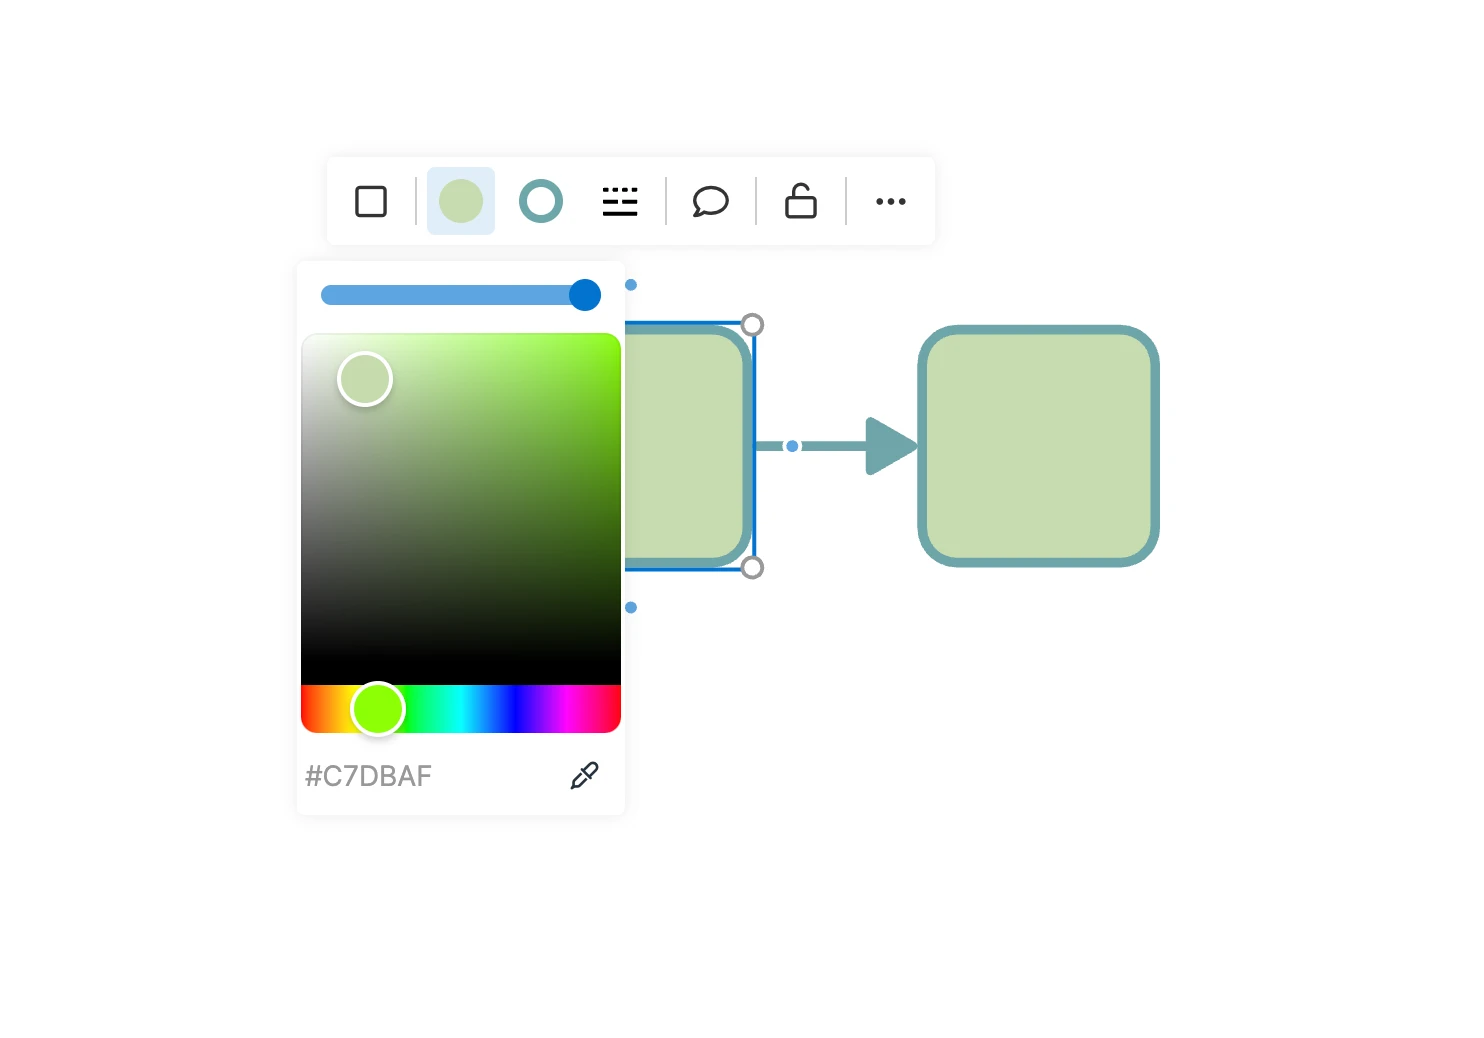
Use custom colors
You can customize the colors your use for text and objects on your whiteboard rather than use default color options. This is a great way to reflect your brand in your whiteboard content. Once you have selected custom colors, they will be saved to the bottom of the color selector menu so you can use them again with just a click.
To select a custom color, click the + and enter the color's hex code or use the dropper tool to select a color displayed on your screen. The color will then be available for reuse. Right-click a color for the option to remove it from your palette.
Group, align, and reorder content
Once you have added multiple items to a whiteboard, you can customize your whiteboard's layout by grouping, aligning, and ordering content. Aligning content can help you create neater, more visually appealing diagrams, flowcharts, and mind maps. And if you have multiple overlapping objects, select their order to show dimension or illustrate sequences.
To group content, select the area around the items you want to group or hold the Shift key and click them one by one. Then use the Group button to group objects. Use the Ungroup button to reverse your action. Double-click an image in a group to edit it individually without ungrouping.
To align objects, select the area around the objects or hold the Shift key and click them one by one. Then use the Align button to align the objects.
If you have placed objects that are on top of one another or overlapping, you can customize their order by selecting and object and clicking the More options button. From here, you can choose to Bring to front or Send to back.
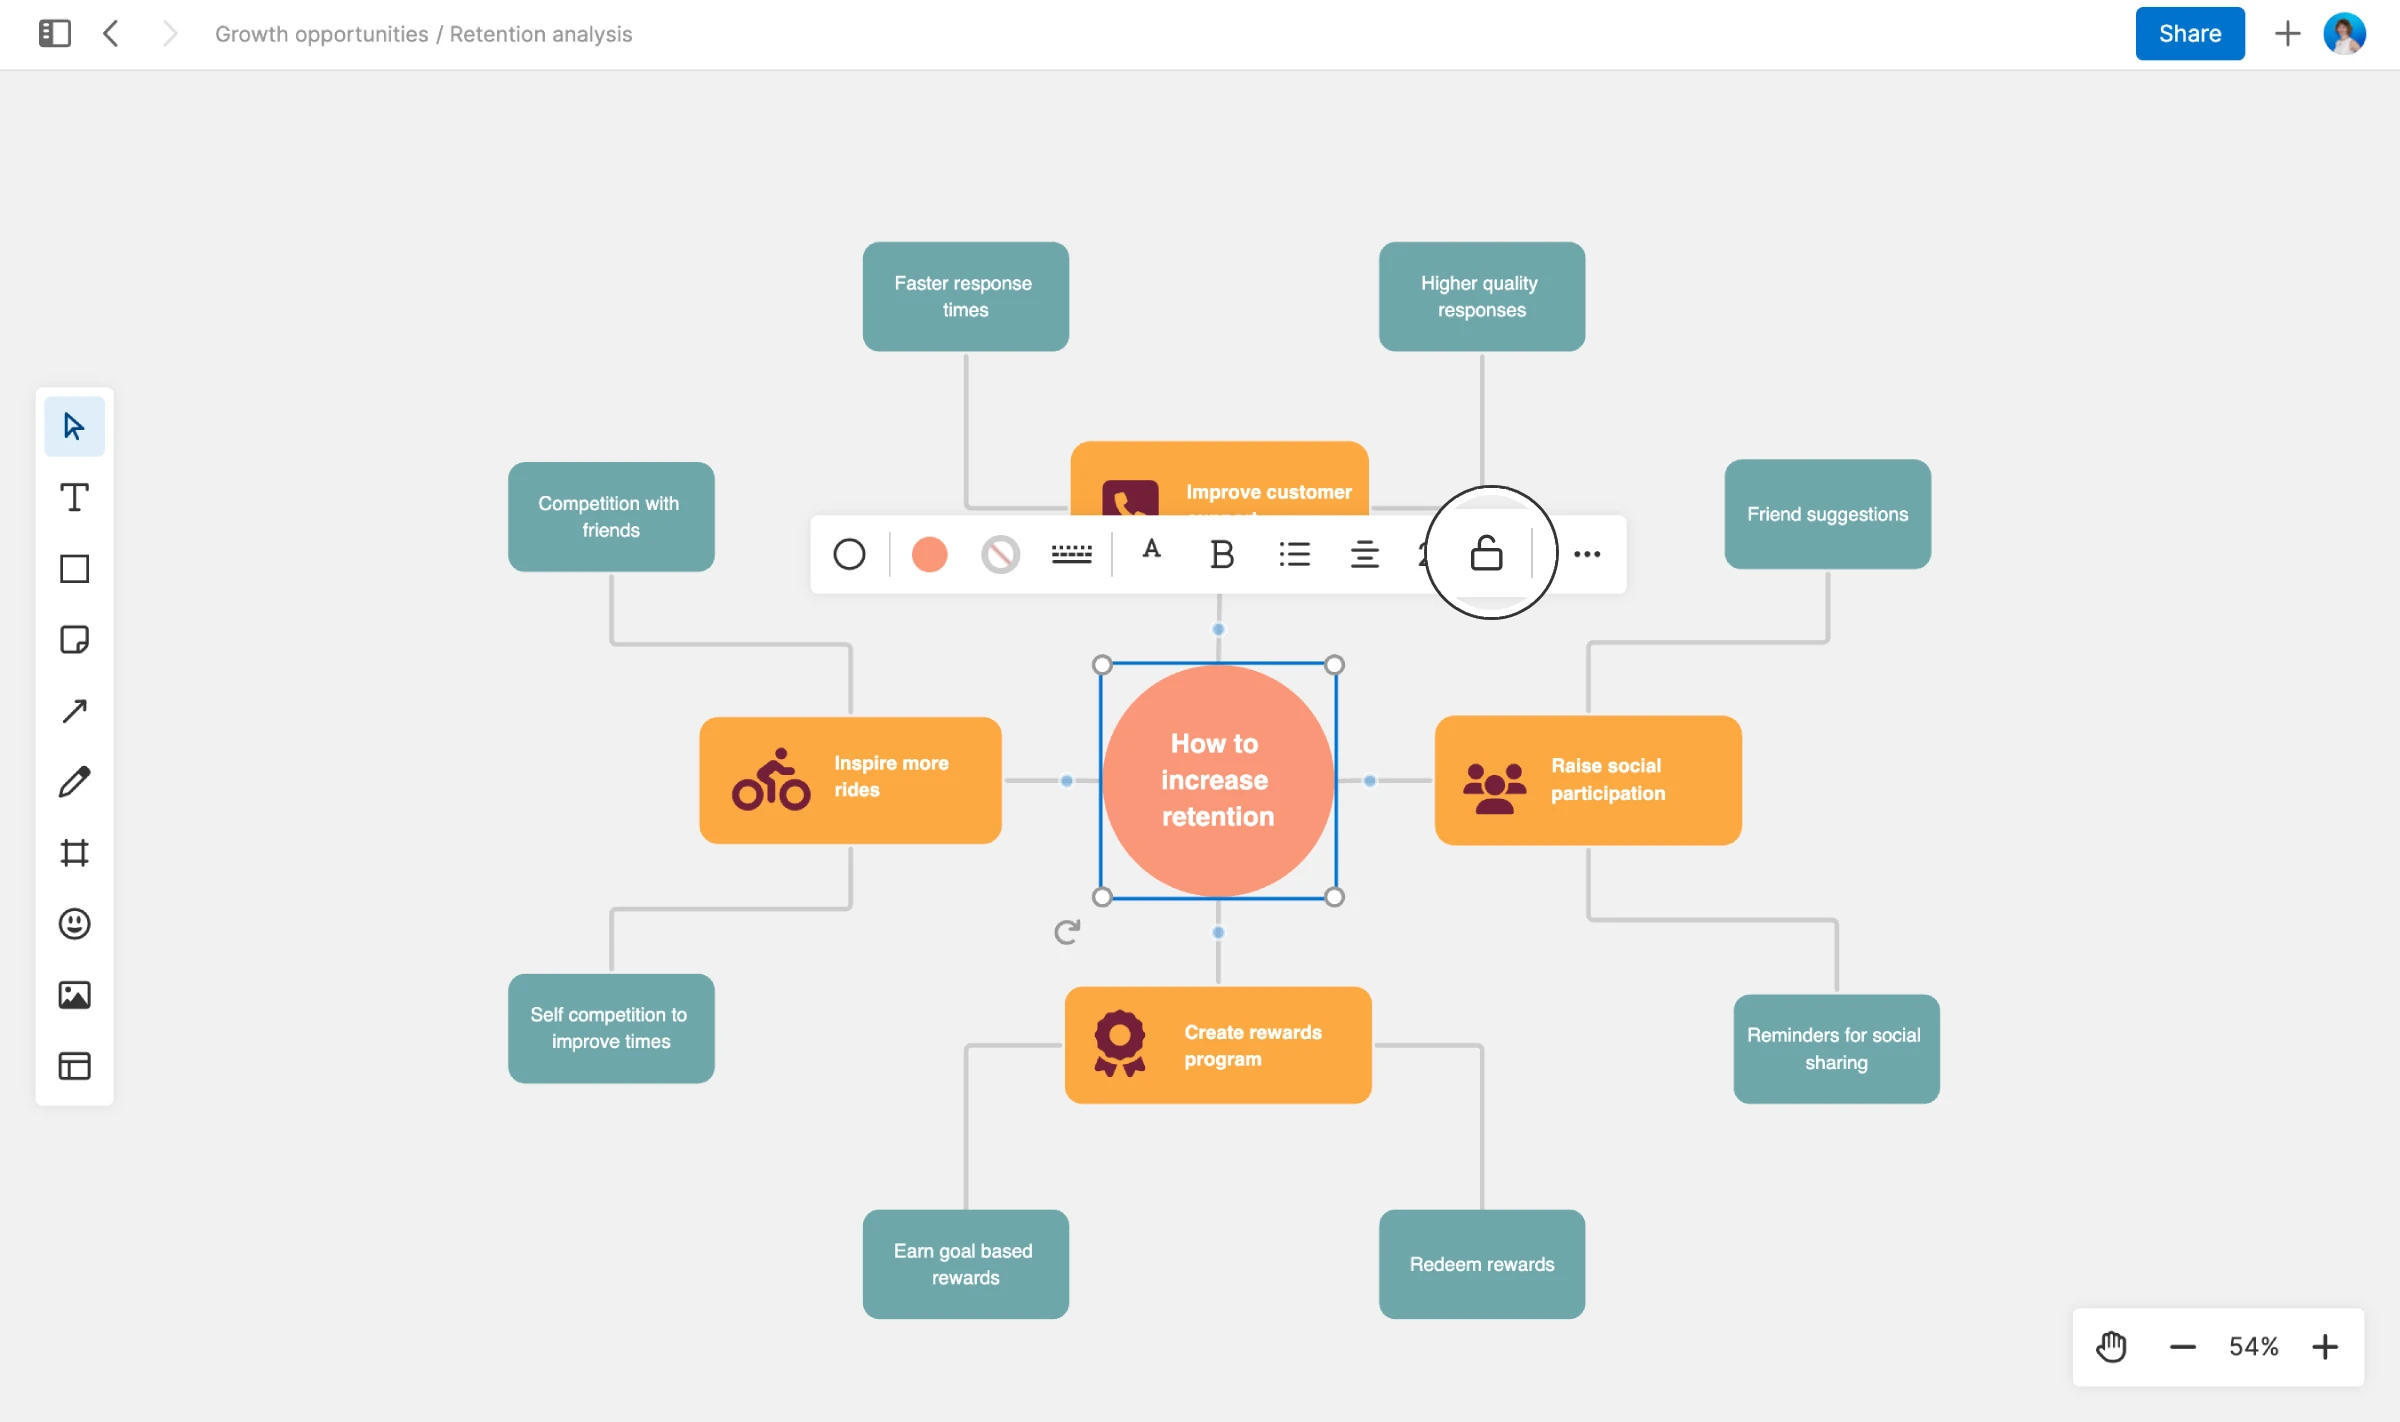
Lock an object
Lock an object on your whiteboard to ensure that it remains static — so that no one accidentally moves or deletes it during a collaborative session.
Select the object you want to lock and use the Lock icon in the object's toolbar. You can also right-click the object and select Lock.
Use the Command+Shift+L shortcut to lock an object you already have selected.
Select a locked object and click the Lock icon again to unlock it and make it editable.
Once an object is locked, no one using the whiteboard will be able to select, delete, group, resize, or add a connector to the object. If the object has a connector attached to it, it will remain attached. When a user clicks a locked object, the Lock icon will show that it is locked. Any whiteboard user with edit access can lock or unlock any object on a whiteboard.
If you have previously grouped several objects, you can select the group of objects and click the Lock icon to lock them together. If you need to edit one of the grouped items, you can unlock it individually and remaining grouped objects will remain locked.
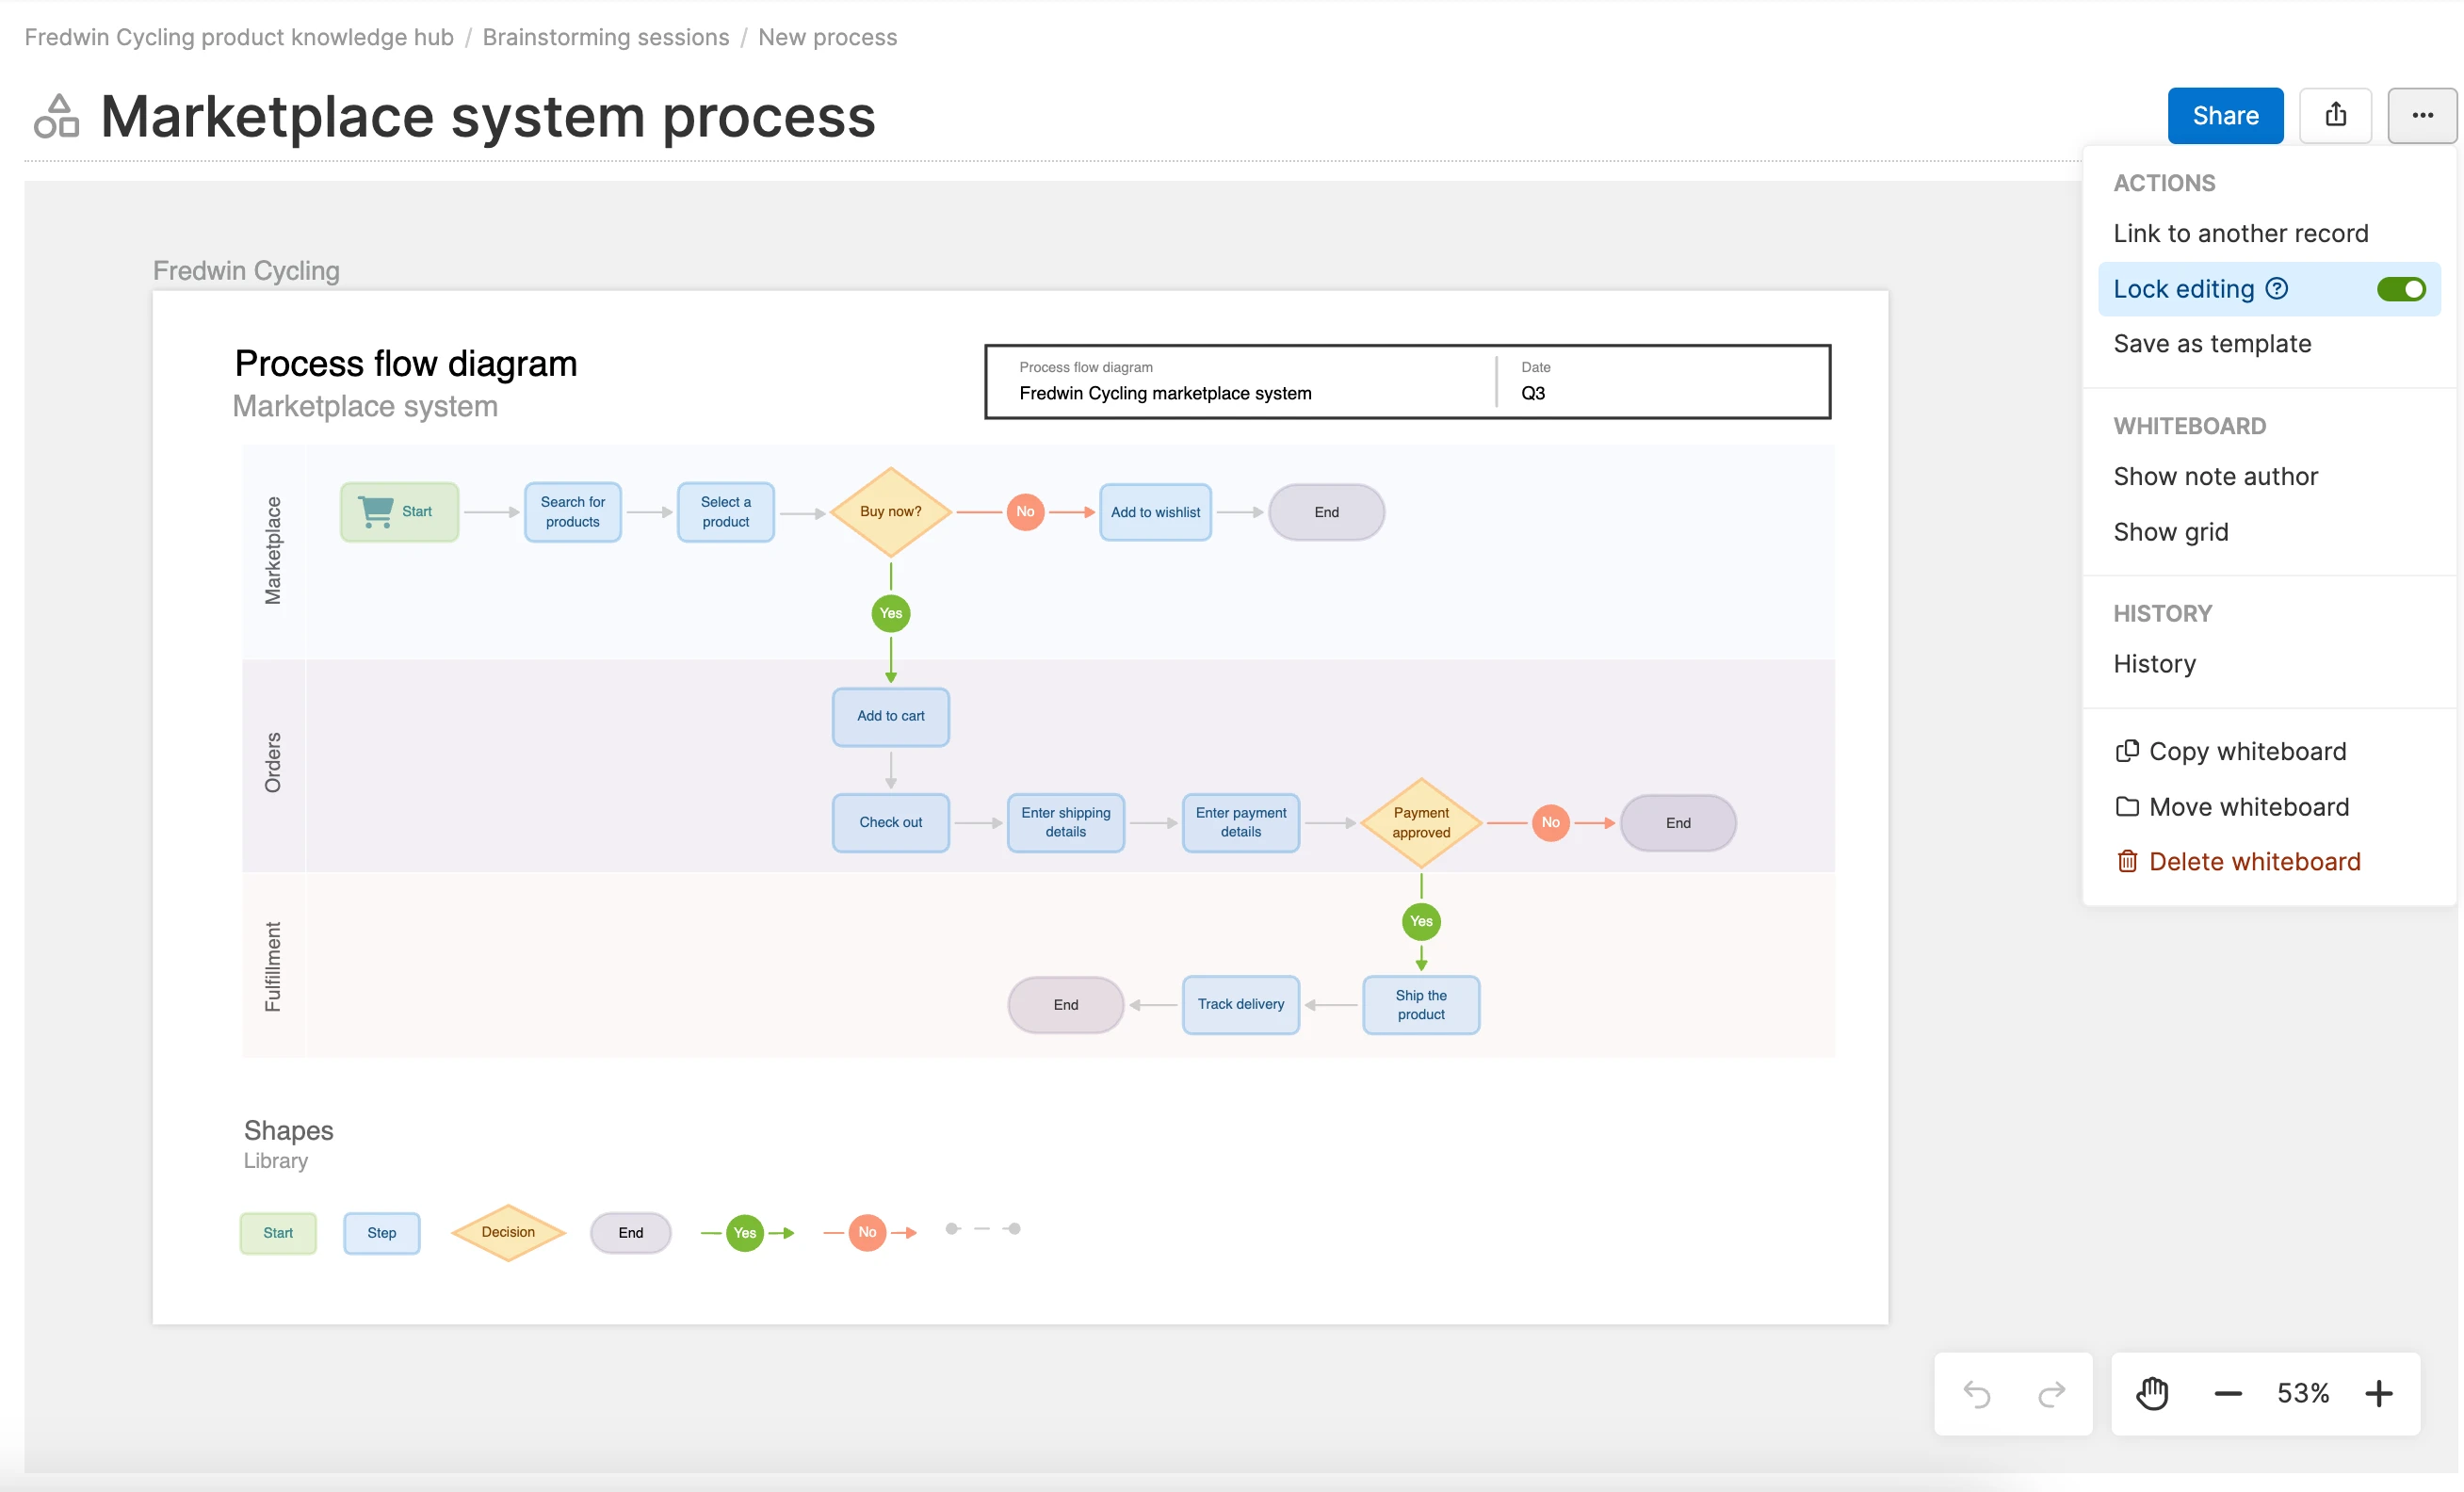
Lock all editing
Protect your whiteboard for all accidental edits. This is perfect for specific workspace whiteboards that you want to be read-only for reviewers that have edit access to workspace documents.
Lock editing for any workspace or personal whiteboard. Click the note's More options. menu and click the toggle to Lock editing. Do the same action to unlock it when you are ready for it to be edited again.
Only you can lock and unlock editing on a personal whiteboard, even if you have shared it with someone that you have given Edit access to. Owners and contributors can lock and unlock editing on workspace whiteboards.