Filter reports
You can report on almost every data element in your Aha! account. Whether you choose one of the prebuilt example reports from the reports overview or create your own report with the report builder, you are well on your way to a world of insightful reports and impressive data visualizations.
Whichever Aha! product you are using, you have a broad range of filtering options at your fingertips to refine your report and focus on the specific data you need. Add Basic filters quickly to the top of your page. You can also lock filters or set them to automatically update. If you want to add logic to your filters, use Advanced filters.
Click any of the following links to skip ahead:
Set basic filters
Basic filters are a great option for refining data without navigating away from your report. To create a basic filter, hover over the filters bar at the top of the page and click the Add filter icon. Select a record type, then one or more filters. Click Add to add them.
Set advanced filters
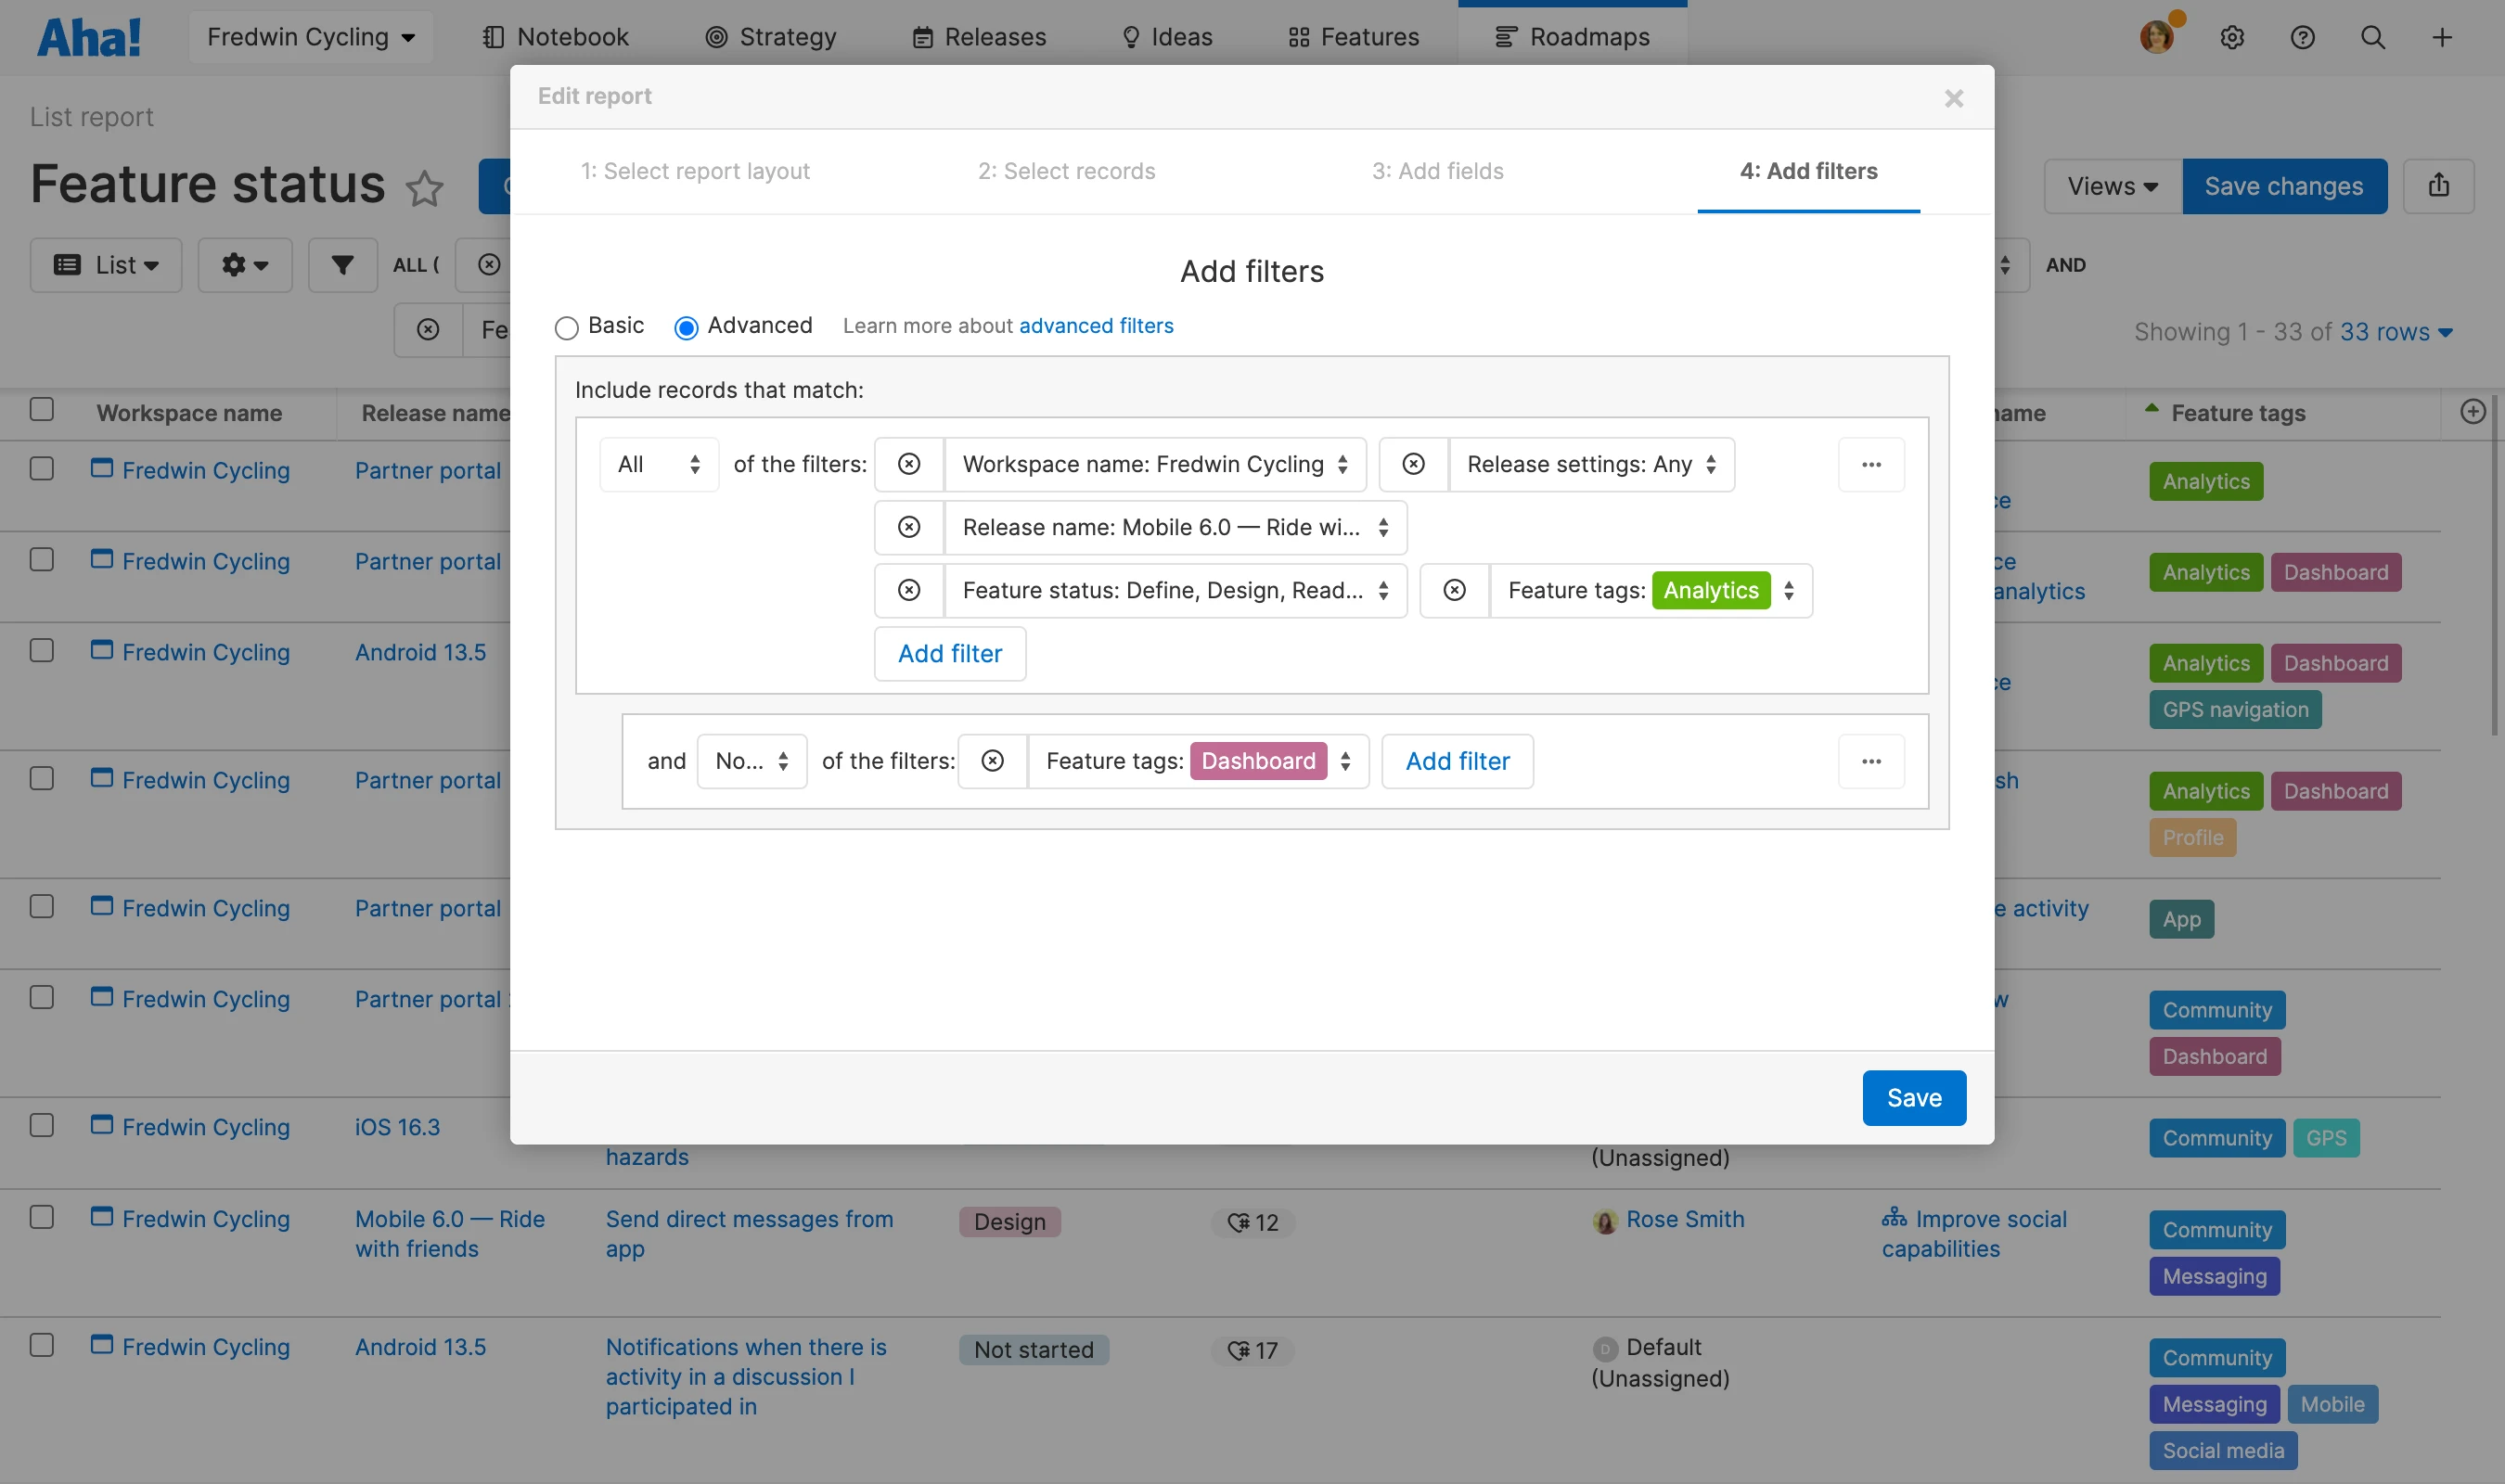
Advanced filters let you bring the logical operators All, Any, and None to your filter logic. To create an advanced filter, click the Edit filters button on your report and the report builder will open to the Add filters step of the process.
With basic filtering, the resulting data will match All of the filter values.
Advanced filtering enables All, Any, and None filter logic and creates nested logical groups through the use of groups and subgroups.
All: Enables the "AND" logical operator between filters and includes results matching all of the filter values.
Any: Enables the "OR" logical operator between filters and includes results matching any one of the filter values. After clicking Set filter, select multiple values from the filter dropdown on your report.
None: Excludes results matching any of the filter values.
Use multiple operators in one advanced filter by creating filter subgroups. To do this, click the More options button on the far right of the filters you have added. Subgroups are nested under a parent group and function as a way to create a filter that is based on the previous filter.
Subgroups enable you to use the same filter more than once. For example, if you would like to filter your report for all features that have an Analytics tag, but want to exclude features that have both an Analytics and a Dashboard tag. Navigate to your report's Advanced filters and add a filter for the Analytics tag, then add a subgroup, filtering for None of the features with a Dashboard tag.
You can reorder subgroups or rearrange filters by clicking and dragging them to the location you want.
Once you have defined the filters you want, click Save to apply the filter. If you want to refer to your filtered report in the future, save the view.
Set filters to automatically update
Aha! users add and remove records constantly. Since workspaces and teams are one of the most commonly applied filters, it can be helpful to set your report to include records for all workspaces, even workspaces that have not been created yet.
To set a report filter that includes all workspaces, try choosing the Auto-update filter option. Once enabled, any new records added to the record type or group will be automatically added to the report filter.
When this filter option is enabled, you cannot deselect a child workspace. This setting is only available for removable report filters — some report filters are inherent to the report and cannot be removed. As such, these types of filters cannot use the auto-update filter option.
Lock and unlock a filter
Report filters can be locked on saved views to control access to data when sharing a report.
Locked filters cannot be changed or removed unless they are unlocked. The filter can only be unlocked by users who are owners or contributors that have view and edit permissions on the report, which are defined in the report details.
To lock a filter on a saved report:
Create a new report or choose an existing report where you have view and edit permissions.
Add a filter. You can add a basic filter by hovering over the filters bar and clicking the Add filter + icon. Add an advanced filter by clicking the Edit filters icon.
Right-click or Ctrl+ click on the filter to lock and unlock it.
Save the report. Now when this report is shared, the filter will be locked.
Filter locking and unlocking is available on all reports where filtering is available.
Sort reports
You can often sort data in a report in addition to filtering it. For example, in a list report, click the More options button beside any column to sort your report by that column.
On pivot tables, you can sort your data by multiple fields — even if you have not included those fields in your report. For example, you may want to sort the ideas in your pivot table in descending amount of proxy votes, without displaying that field in the table.
To do this on a pivot table, click Customize view and then select Edit data. Click Sort fields to sort that section of the report:
Click and drag to reorder the available fields. Your view will be sorted by the top field first in descending order. For example, you could sort ideas alphabetically first and then by the month when they were created.
By default, you will Sort a given field By itself — so you would sort an Idea name alphabetically.
You can use the By dropdown to sort a field by another field not included in your view. For example, you could sort Idea name by Idea created month.
In the last dropdown, choose which direction you would like to sort your field.
Click Done to save your changes, then click Save to exit the report builder.