Introduction to whiteboards
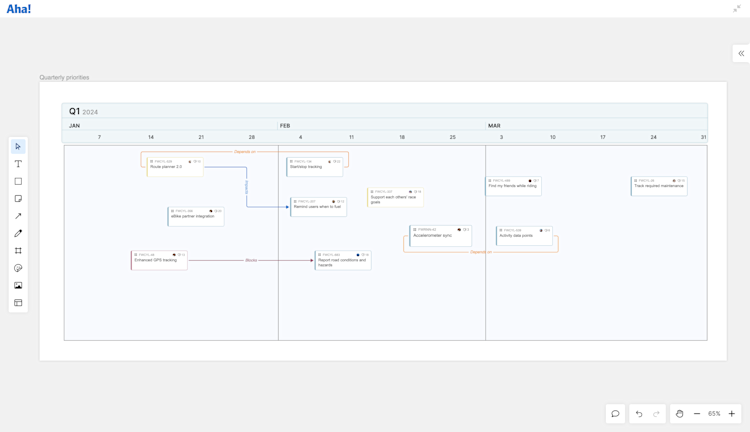
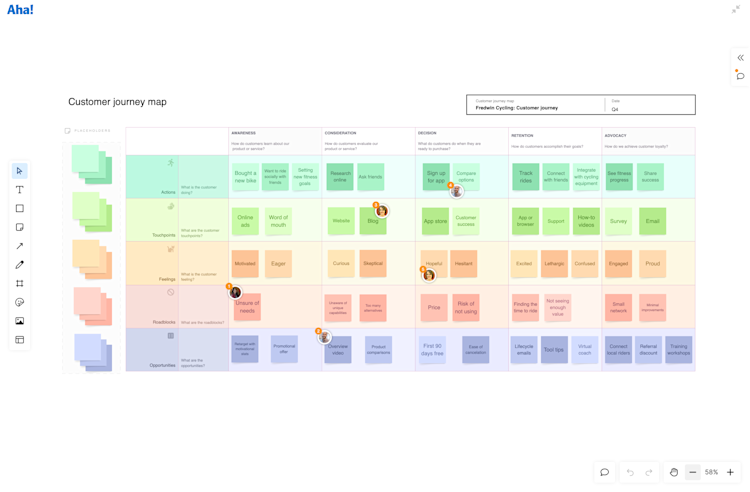
Whiteboards are a critical tool for each stage of the product development lifecycle. They help you build out and refine concepts in a visual form — an important first step in building lovable products. Create beautiful diagrams, journey maps and user flows, and collaborate with your team to develop and visualize new concepts. And when the time is right, convert whiteboard elements into actionable items on your product roadmap.
Click the following links to skip ahead:
Add a whiteboard
You can use whiteboards on your own or collaboratively with your entire team. You can add a whiteboard to a workspace so everyone in that workspace can access it, or add one to your personal documents to work on alone. You can also embed a whiteboard in an Aha! record an like initiative, feature, or requirement to add visual context to your team's work.
Create a new whiteboard
To add a whiteboard to your workspace documents, navigate to your workspace documents. To add a whiteboard to your personal documents, navigate to your My work page. Then click Add and select Whiteboard.
Your new whiteboard will open automatically and will be located below the note you currently have selected in your document hierarchy. You can drag and drop it to change its location, click its title to rename it, and click the whiteboard icon next to its title to add a customized title icon.
Create a copy of a whiteboard
To create a copy of a whiteboard, access its More options menu in the upper right corner and select Copy whiteboard. A copy of the whiteboard will open and will appear in the document list to the left below the the original whiteboard document.
Embed a whiteboard in an Aha! Roadmaps record
Add a whiteboard to an existing note or other Aha! Roadmaps record from the text editor. While editing a note or record, click the + dropdown and select Whiteboard. The new whiteboard will appear one space below your cursor. Click inside the whiteboard or click the arrow icon in its top-right corner to expand the whiteboard window. Click the X in the top-right corner to close it and return to the note.
Keep it organized
Whiteboards provide infinite space to ideate, sketch, and diagram. As you add objects, your whiteboard will expand to provide even more space for you to use.
The more content you add to your whiteboard, the more necessary it becomes to keep it tidy. Frames are perfect for organizing diagrams, templates, and other content you add to your whiteboard. Add frames and build diagrams within them or a draw a frame around content you have already added to your whiteboard.
Add frames
From your toolbar, select the frame icon and draw your frame. Then rename your frame by editing its Title field. The label you enter here will be used for the frame navigation in the lower right corner of your whiteboard.
Your frame will be named "Frame" plus a number by default, with the first frame being "Frame 1" and so on. Click its name to rename it. Frames will appear in your navigation in the order that they were added to your whiteboard.
Navigate your whiteboard
You can navigate around your whiteboard and between any frames you add by using the navigation toolbar in the bottom-right corner.
Scroll around your whiteboard by selecting the Pan button or hit the Space bar.
Adjust the Zoom level with the plus and minus buttons or by pressing Ctrl and scrolling.
Navigate to a specific frame on your whiteboard by clicking the Zoom % and select a frame from the list in your frame navigation.
Scroll through frames quickly by using the Next frame and Previous frame options or by using the Space bar.
Use whiteboard features
Whether you want to start from scratch or use a template, whiteboards offer variety of tools you can use to create plans, diagrams, models, and sketches.
Start from a template
Access the Aha! template library from your whiteboard's toolbar. With nearly 100 templates to choose from, you can start your brainstorming session, sprint planning meeting, or early-stage plans with a purpose-built template created by product experts. Each template includes best practices and an inspirational example. You can create custom whiteboard templates too!
Add content
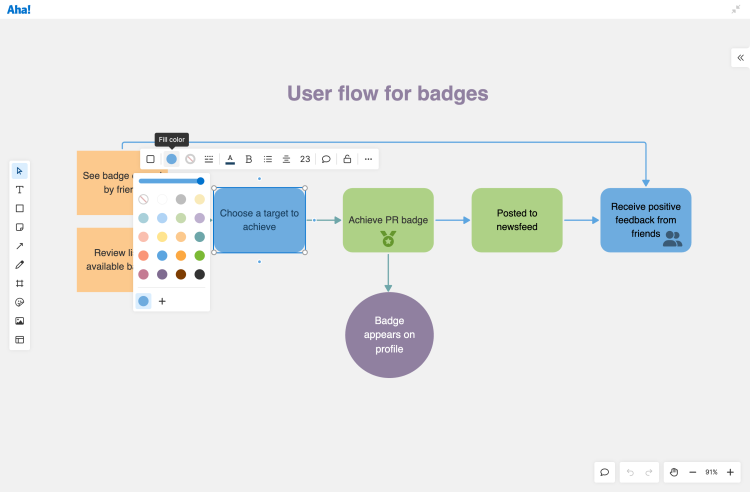
Use your whiteboard's toolbar to add content to your whiteboard. Add shapes and connectors to build diagrams or use drawing tools to sketch out concepts.
Use advanced shapes
Advanced shapes enable you bring your early-stage plans to life. Create timelines to sketch out a prospective roadmap or add a table to make content more digestible.Top
Add media
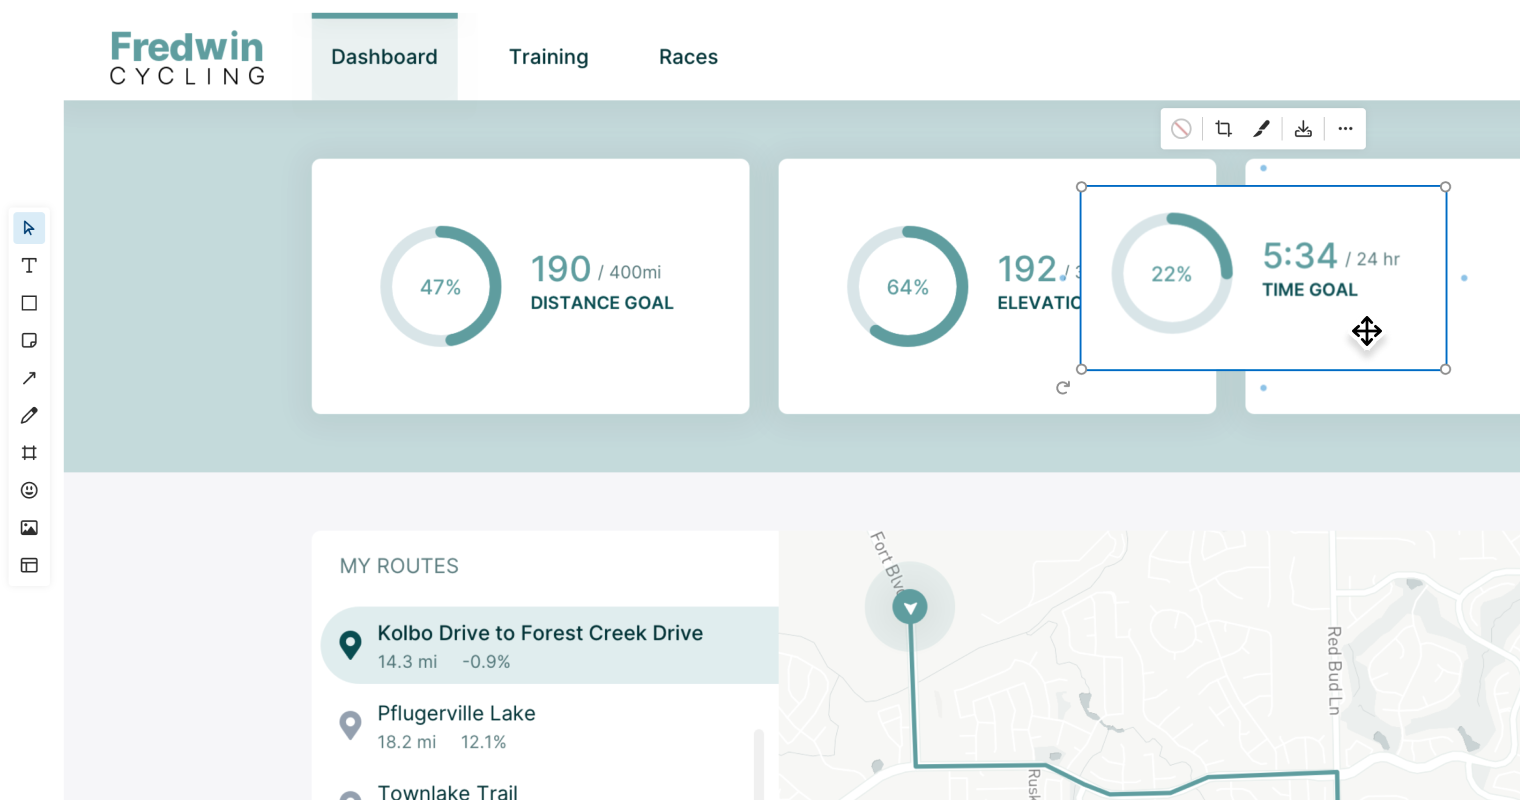
Add images, gifs, or video to convey complex concepts, demonstrate workflows, or showcase user experiences. Edit images, add overlays, and clips parts of images to experiment with new layouts.
Collaborate with teammates and stakeholders
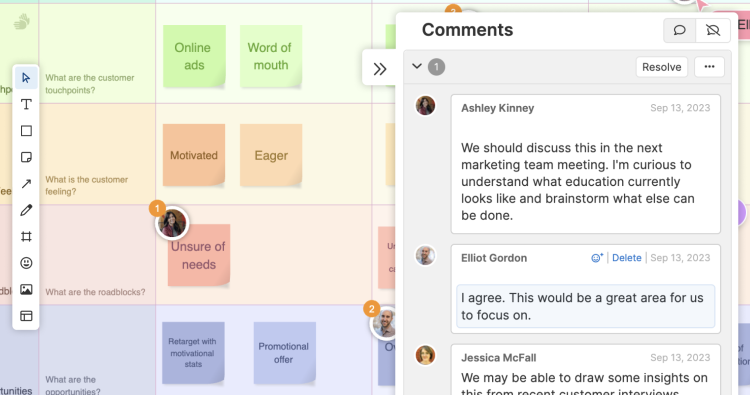
Whiteboards are built for collaboration! Use collaborative features like comments, emoji reactions, and a timer tool to facilitate meetings and brainstorming sessions, aligning the whole team around a shared plan.
Convert whiteboard content to Aha! records
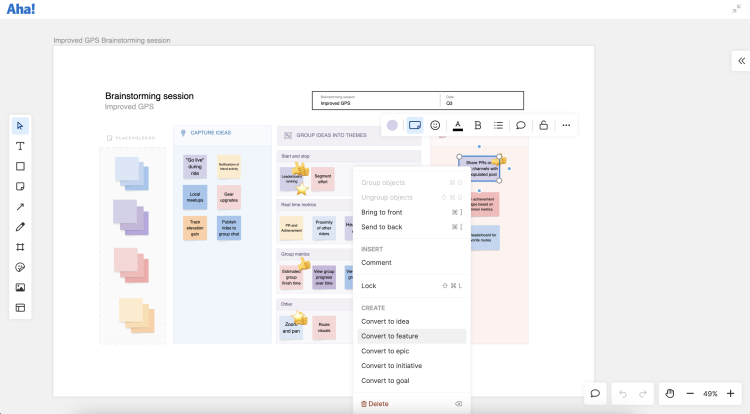
The next brilliant idea may stem from a collaborative session, a weekly team meeting, or a personal whiteboard. Put that idea into action — convert whiteboard objects to Aha! records that you can directly add to your product roadmap.
Visualize Aha! records
Add existing Aha! records to a whiteboard so you can visualize your account data in new ways. You can add records in bulk or individually. You can even add a pivot report to your whiteboard, neatly pre-formatted in a whiteboard table.
