This article refers to releases and features. Depending on your workspace type, you may see "schedules" and “activities" in your workspace.
Aha! Roadmaps | Statuses and workflows
An Aha! Roadmaps workflow is the set of statuses and transitions that a record such as an initiative, feature, or idea may move through during its lifecycle. You can customize your team's workflow by workspace so that Aha! Roadmaps mirrors however your team works best. You can also customize your team's record layouts, types, and statuses.
You will need to be an administrator with customization permissions to create a custom workflow at the account level. But any user with workspace owner permissions can apply created workflows to their workspace. They can also clone workflows to create a copy for themselves or edit existing workflows to make changes.
Click any of the following links to skip ahead:
Add a custom workflow
To add a custom workflow, navigate to Settings ⚙️ Account Statuses and workflows.
Click the Add workflow button to create a new workflow.
Click the Set defaults button to set default workflows.
Use the Workflow type dropdown to filter the list of existing workflows.
When you click the Add workflow button, you can select which type of record workflow you wish to customize. You can create workflows for the following record types:
Goals
Initiatives
Releases / Schedules
Features / Activities Note: This also applies to epics, and to requirements.
Ideas
If you want to create a custom workflow from scratch, select Simple example. If you want to use one pre-built for a particular workspace type, select it from the list of example workflows, then click Create workflow to create your workflow.
You can customize your workflow once you have created it. Update the Name of the workflow and add an optional Description.
Next, select whether your workflow will be flexible or fixed.
Flexible workflows allow users to skip steps in the workflow and do not support approval gates. They are best suited for workflows that do not follow the same steps in the same order every time — drafting a go-to-market blog post for a content marketing team, for example, with a variable number of reviews depending on the post's content.
Fixed workflows do not allow users to skip workflow steps and support approval gates. They are best suited for workflows that need to be consistent, like a product development initiative that needs regulatory and financial approval before implementation can begin.
Notes:
If you choose to create a fixed workflow, you will also see the option to Restrict approval changes. When selected, only administrators with customization permissions will be allowed to edit or delete approval to-dos created by the workflow.
If you are using a fixed workflow for ideas, check that the first status in your workflow has a status transition configured to the first status in your In Progress status category. This ensures that records can be promoted and change in status as expected.
Set default workflows
You can set a default workflow, by workspace type and record type, by clicking Set defaults.
From the modal, select the appropriate workspace type tab, then select the workflows you want to be the default for each record type.
Note: Requirements and epics both use feature / activity workflows. You can create separate feature / activity workflows for each record type, or use one workflow for all three.
Once set, the workflows you select will be the default workflows the next time someone creates a workspace in that type. Aha! Roadmaps administrators can use this setting to drive consistency across workspaces of the same type. Workspace owners can change the default workflows if they need to.
Add custom statuses
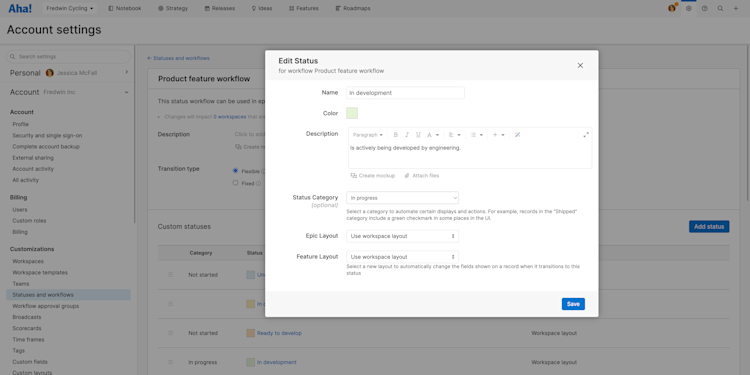
There are two ways to add custom statuses. You can edit the workflow's example statuses to reflect your processes. Or you can delete the example statuses and create new ones by clicking Add status.
You may want the names of your custom statuses to map to the statuses used in other third-party tools (like your bug tracking system). This is particularly valuable if you have integrated Aha! Roadmaps with a third-party tool.
Choose status categories
Status categories in Aha! Roadmaps help you automate certain displays and actions.
When you add a new status or edit an existing status, you will be able to choose the status category that best matches. You can have multiple custom statuses that have the same status category. For example, Design and Development statuses might both be part of the In progress status category. If the status does not match one of the category options, leave it blank.

There are some considerations when choosing status categories for ideas:
When a user adds a new idea, the idea defaults to the first status listed in your workflow. These appear in order from top to bottom — you can drag statuses to reorder.
Promoting an idea to a feature will automatically change the idea status to the first custom status in the status category In progress.
Only statuses that are in a status category will be published to or trigger email notifications from public and private ideas portals.
Shipping a feature triggers the idea status to change to the first status in the status category Shipped. Note: If you do not have a status category of Shipped in your release workflow, shipping the release will revert the release to the first status in the category Not started.
Status categories also affect features and releases. The changes below only apply when a release is shipped using the Ship release button and not when the status is changed using the dropdown:
When a release is shipped, all features with statuses not in the categories Done, Shipped, or Will not do will be moved to another release.
Any features with statuses in the category Done will be changed to Shipped.
If you do not have a status category of Shipped in your release workflow, shipping the release will revert the release to the first status in the category Not started.
Finally, the status changes of a feature's requirements affect the parent feature:
If any requirement has a status in the category of In progress, then the feature status will change to In Progress.
If all requirements have a status in the category of Done, then the feature status will change to Done.
If all requirements have a status in the category of Shipped, then the feature status will change to Shipped.
If all requirements have a status in the category of Will not implement, then the feature status will change to Will not do.
Set transition buttons
Transition buttons help Aha! Roadmaps users follow a predefined workflow. To add transitions between two statuses, click the + icon in the Transition buttons column beneath the first status. Then you can choose how the statuses should flow and add a name for the transition button.
If you want to add approval gates to your transitions — so that a record will need a formal approval before it can move to the next status — you will want to read more about workflow approvals.
The name of the transition appears on the button for moving between states, so choose an action phrase, such as "Start designing." It is also helpful to acknowledge the completion of a step in your flow, such as "Requirements completed."
Sync statuses to another record type
Ambitious work gets completed one step at a time: feature by feature, requirement by requirement. You can already calculate an epic's or a feature's progress from its child records, but you might also want epic and feature statuses to update as contributing records progress through their workflow.
With these settings enabled, parent records' statuses will stay in sync with their child records' status categories — so for example, once a feature moves to a status in the In progress category, the epic's status will change to the first status in its In progress category.
A few things to note about workflow syncing:
You can always manually change the status of any record.
The parent record's status will change once the first child record's status advances to a new status in the workflow.
The workflow sync follows your records through the workflow from Not started to Shipped or Will not do. It will not stay in sync if you move backwards in the workflow.
Workflow sync works with automation. However, if you use automation on the child record and the parent record has a fixed workflow, the statuses will not remain synced if syncing would cause the parent record to skip a step in its workflow.
If you have synced requirements and features, and features and epics, it is possible for a requirement's status change to update a feature's status, which then updates an epic.
Navigate to ⚙️ Settings Workspace Configure Workflow syncing to to define status syncing for a workspace:
Epics: Choose whether an epic's status should automatically update when its features update.
Features: Choose whether a feature's status should automatically update when its requirements update.
Note: Epic workflow syncing is disabled by default for Aha! Roadmaps workspaces created before March 24, 2021, and enabled by default for workspaces created after that date. If you want to see your workflow syncing settings for each workspace across your account, use the workspace settings report.
Use advanced custom layouts (Enterprise+)
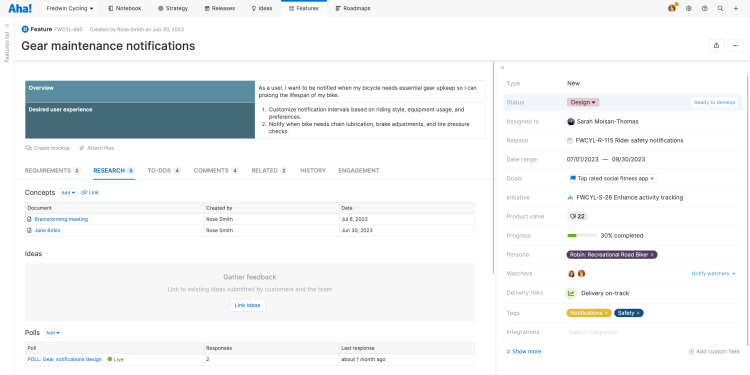
So far we have discussed custom layouts and custom workflows in a one-to-one relationship: one custom record layout for every custom workflow status. This means that members of your team will see the same arrangement of fields and tabs through the entire lifecycle of a created record.
But sometimes, your work is not that simple. If a feature is in the definition phase of product development, for example, it may not need any of the fields that help you collaborate with designers and developers. You might want to optimize the feature layout for the product manager who will be reviewing, researching, and defining the feature. But once defined, you may need a more sophisticated layout for your feature: scorecard fields for developer estimates, user fields for the assigned UX designer, and custom fields to track expected revenue, set advanced estimates, or link to custom tables.
Enterprise+ customers can use advanced custom layouts to set a different custom layout for any workflow status that would benefit from it.
Apply a custom workflow to a workspace
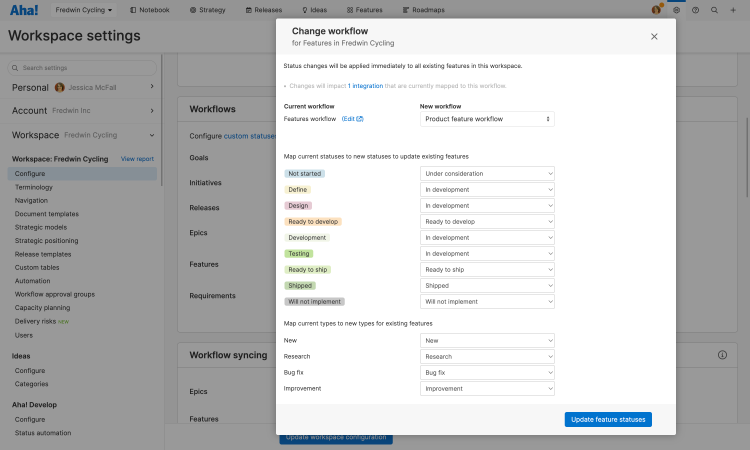
The last step in setting up a custom workflow is to apply it to a workspace. Workspace owners can do this by navigating to Settings ⚙️ Workspace Configure. This is true for all workflow types, except ideas, which are covered in the next section.
Changes to a workflow are applied immediately and affect existing records.
If you change the workflow for a record type in Settings ⚙️ Workspace Configure, it will change the statuses for all records in that workspace, which cannot be undone.

To change your account’s default workflows assigned to new workspaces, navigate to Settings ⚙️ Account Configure statuses and workflows and click the Set defaults button at the top of the page.
The default workflows you set are automatically applied when new hierarchy elements are created. Note that the updated default workflows are only applied to newly added workspaces — they are not applied to existing ones, which you must update individually.
Apply a custom ideas workflow
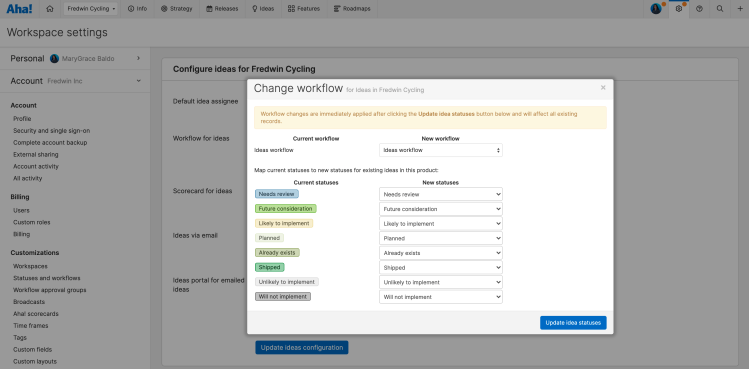
Idea workflows are assigned in Settings ⚙️ Workspace Ideas Configure. Click on the Edit ideas workflow button and select the new workflow to be applied. You will then be prompted to map current statuses to new statuses.

After your ideas workflow is updated, you can also decide which statuses show in your ideas portal. Go to Settings ⚙️ Account Configure statuses and workflows. Select your workflow and you will see a column that indicates whether the status is visible on your portal or not.
To show a status in your ideas portal, click on the status and check the Show in ideas portal option.
