Aha! Develop | Documents
Just like pages of a notebook, the digital documents within Aha! Develop are versatile — some are for writing, and some are for sketching. Use notes, whiteboards, and meetings to define team processes, train new members, refine new concepts, or any other use that comes to mind. Start from scratch or access the built-in library of guided document templates to inspire creativity, drive consistency across teams, and establish a standard approach for documentation.

Click any of the following links to skip ahead:
Create new documents
Create a new note or whiteboard document from scratch — or start from a template. Click the Add button and select Note, Whiteboard, or Meeting to open a new blank document. Select Template to open the template gallery.
New personal documents will be titled to today's date by default and new team documents will be titled as Untitled — but you can edit a document's title, title icon, and date at any time. When you create a new document, you can find it in the Documents list on the left side of your screen. It will be listed after the last document you accessed. If you last accessed a folder, you will find the document in that folder. Drag and drop it to any folder you wish to stay organized.
Add a custom field to your documents layout to track relevant information and report on your documents.
Organize documents
Once you have created a few notes and whiteboards, it makes sense to organize them. Bringing structure to these documents is as easy as clicking and dragging them in the left side panel of the notes page.
Folders
Folders are a simple way to keep your documents organized.
To add a folder, click Add and select Folder from your team or personal documents. Name your new folder, then drag and drop it into the desired place in your document hierarchy.
If you want to include a description, try using parent and child documents in your document hierarchy.
To add a document to your folder, select your folder and then choose the type of document you want to add. Drag and drop existing notes in the left side panel to move them into a folder.
Parent and child documents
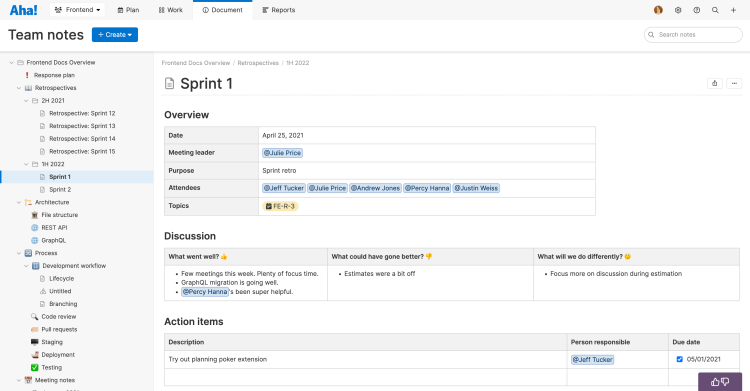
Parent and child documents are organized just like systems of folders. The only difference is that instead of having a folder as a container for a group of notes, one note serves as a parent note with child notes nested below it, setting up a nested hierarchy. This is useful when you want to include specific directions or details to a group of documents for context.
To nest one note under another, click it and drag it on top of another document.
To remove a note from a parent-child relationship, click it and drag it to a new location.
Reorder documents
To reorder a document, click on it and drag it to your preferred order. If you drag a parent document, all nested child notes and whiteboards under it will come with it. To move multiple documents at once, use Shift + click or Cmd/Ctrl + click to select the documents you want to move. Then drag and drop them together to their new location in the document list.
You can drag parent documents to new locations whether they are expanded or collapsed, but it might be easier visually to do this while they are collapsed.
When you drag a note or whiteboard to a new location, the blue bars in your Aha! Roadmaps account will show you where it will land in order.
A thin blue bar means your document will exist above or below another document in the order.
A thick blue bar means that your document will be nested under another document in the order.
Sort documents
You can quickly sort a folder's contents to keep your documents organized. Right-click a folder or parent document to sort its contents by Name or Date created.
Document collections and standalone documents
Organizing your documents into nested hierarchies is just the first step. As you build out the team and personal documents in your account, your documents hierarchy can become quite complex.
Instead of scrolling through a hierarchy expanding every parent document, click on a parent document to see a preview of all its child documents.
Document collections — child documents with sub-documents of their own — display here as tiles. Each collection includes the first three lines of the document's description, the top three child documents, and a total document count.
Standalone documents — child documents without sub-documents of their own — are listed at the bottom.
You can control what documents appear in these views by clicking on a parent documents, then clicking More options Hide nested notes.
Customized title icons
Every document you create has a title icon. By default, this is a page icon for standalone notes, a shapes icon for standalone whiteboards, and a folder icon for parent documents. You can change these title icons to emojis to help your documents and document collections stand out.
To do this, open a document and click its title icon. Click or search for any replacement emoji you prefer, and the title icon will update.
Header images
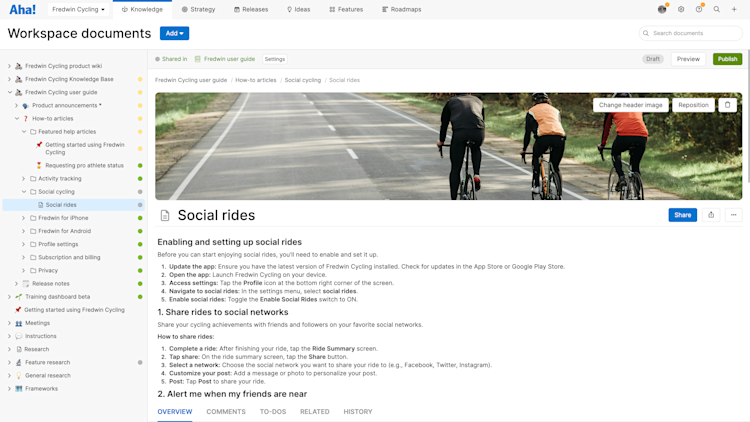
Add a header image to your note to add visual interest or help readers recognize a document's content at a glance.
Hover your mouse above any note or meeting's title and click Add header image.
Select an image from your computer to upload.

After uploading your image, you will see it at the top of the note. It will be resized automatically. If you want to make changes to your header image, hover over the image and select an option in the upper right:
Change header image will prompt you to select a different image from your computer to replace the current image.
Reposition will enable you to click and drag the image to reposition it.
The Trash icon will remove the image from the document.
Add a link to the documents list
Your team documents are a great place to store any type of product documentation your team needs to access — like meeting notes, customer interviews, user flow diagrams, or internal processes. Having this information in a centralized place helps you effectively capture and share team knowledge. But you might need other information like outside links and documentation that is stored in other teams ready at hand as well. Add links to spreadsheets, design style guides, integration documentation, and other outside information right within your documents list — so you and your teammates do not have to leave your team documents and search for information elsewhere.
Team owners and contributors can add links to team documents.

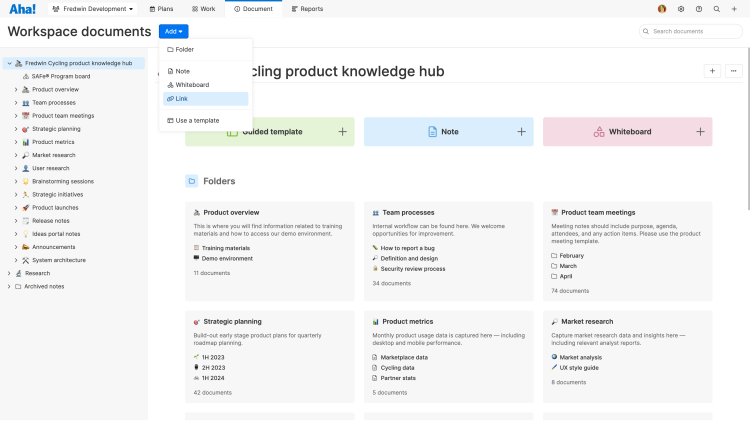
To add a link to your documents list, click Add Link. Then select either Aha! link or External link.
Aha! link: Select the record type (Document will be preselected) from the dropdown and choose a the document or record you want to link to.
External link: Enter the URL you want to link to and enter the display text you want to show for your link.
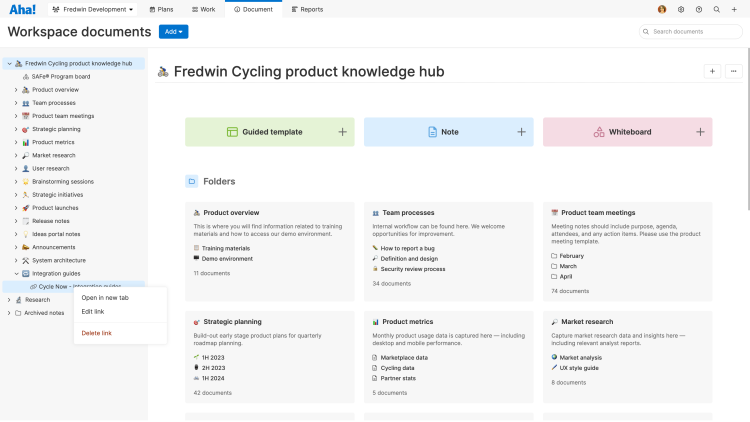
After you have added a link, it will appear after the document you last selected in the documents list. Drag and drop it wherever you would like it to show in your documents list.
When someone clicks an Aha! link that you have added to your documents list, it will open within your documents. If it is an Aha! record, its drawer view will open. Anyone who has permission to edit a document in the team where it is located will also be able to edit it from here. If they do not have permission to edit it, they will not be able to edit it from your team, even if they have contributor permissions to your team.

When someone clicks an external link you have added to your documents list, the link will open in a new browser tab.
If you want to remove a link from your documents list, right-click it and select Delete link.
Lock editing
You can protect any document from accidental edits so you do not lose important information. This is perfect for specific team documents that you want to be read-only for reviewers that have edit access to team documents.
Lock editing for any team or personal document. Click the document's More options menu and click the toggle to Lock editing. Do the same action to unlock it when you are ready for it to be edited again.
Team owners and contributors can lock and unlock editing for team documents.